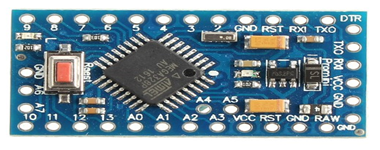
What is Arduino Pro Mini?
Arduino Pro Mini, the small-sized, flexible, and low-cost microcontroller, perfect for mobile applications.

Do you have a plan to build up a small-sized, handy project like building a chiptune or a digital alarm clock or a smartwatch? Why only these, you may have many more ideas. And obviously, you always want your project to be as compact as possible that not only looks great but also helps in proper handling! So, here I’ll talk about such a module which will make your work easy.
Yes! It’s nothing but Arduino Pro Mini, the small-sized, flexible, and low-cost microcontroller, perfect for mobile applications.
Arduino Pro Mini is nothing but an 8-bit AVR microcontroller based on ATmega328 which is available in two versions i.e. one for operating voltage of 3.3V and other for operating voltage 5V with the following physical specifications:-
- 6 analog inputs
- 14 digital input/ output pins out of which 6-pins is available to be used as PWM outputs
- An onboard resonator
- A reset button
- Built-in LED
These were some specifications you will get on the board of pro mini.
Now, in the next sections, I’ll explain to you in detail that what Arduino Pro mini actually is and how you can utilize it safely, its technical specifications, some of its pros and cons, and lastly some cool project ideas where you can use Arduino Mini Pro.
What is Arduino Pro Mini?
Arduino Pro Mini is a microcontroller based on Atmega328. And the best thing is it is available for both 3.3 V as well as for 5V operating voltage which provides you with flexibility. At 3.3V of operating voltage, it runs at 8 MHz whereas, at 5V of operating voltage, it runs at 16 MHz. These slow speeds ensure the Pro Mini board’s safety.
Holes are provided to mount the pin headers in case it is needed. But the connectors are missing on this board so you can use them in the projects which need permanent or semi-permanent installations. This Pro- Mini is specially designed for semi-permanent installation in the projects.
Before installing the pro mini, you need to program it for once. Therefore, there is a need for FTDI to program the Pro mini, and for which you need to solder the connectors to the Pro Mini Board.
In some cases, headers can be used to interface other peripherals to the Pro Mini board.
Due to a vast variation between Arduino Pro Mini and other Arduino boards in terms of physical parameters, Arduino shields are not fitted to this Pro Mini.
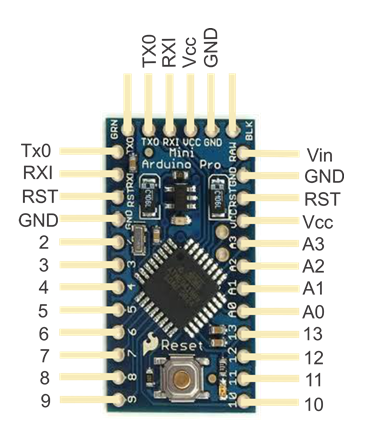
The Programming Header (Pins on the shorter side) is used to match up with the FTDI breakout. The pins on the other two sides (the longer ones) are for General purpose I/O pins (GPIOs) and power pins.
You can use either a battery or a power adapter to supply power to the Pro Mini. And even there is one more option to power Pro Mini i.e. through FTDI breakout via the USB port of your PC.
There is one RAW pin on the pro mini board which is used to supply unregulated voltage to the board. This is a unique feature found on this board for the safety of the processor.
And always remember to supply power through RAW pin only whenever you need to supply unregulated power because, through this, the voltage will get regulated to 3.3V or 5V (depending on which board you are using) before getting into the microprocessor otherwise it can damage the processor.
Now, let’s have a look at its technical specifications that will help you to operate it safely.
Technical Specifications
| Input Voltage Range | 5V - 12V |
| Operating Voltage | 3.3V/5V |
| Crystal Frequency | 8 MHz (for 3.3V) / 16 MHz (for 5V) |
| Maximum current through each I/O pin | 40 mA |
| SRAM | 2KB |
| EEPROM | 1KB |
| Flash Memory | 32KB |
| Pre- installed Flash | 0.5KB |
Pin Configuration
GND: This pro mini board contains a total of three ground pins.
RST: This is used to rearrange the commands given to the board.
VIN: It is used to power the board using external power supplies.
Vcc: Depending on the type of board that you are using, this pin provides regulated voltage either of 3.3V or 5V.
Tx0: This pin is for the transmission of data.
Rx1: This pin receives the data.
Both these serial communication pins are there for communication as well as digital I/O pins.
Analog Pins: Pins numbered A0-A7 are analog pins with a resolution of 10 bits.
Digital Pins: Pins numbered 2-13 are digital I/O pins.
Now, how to get started? Since this Arduino pro mini board is a little different from Arduino UNO, and it does not have an inbuilt programmer, you may face difficulties to work on it. But don’t worry I'm here to guide you through these simple steps to program your pro-mini-board.
Steps to Program Arduino Pro Mini
- Due to the unavailability of ports in the pro-mini-board, you can’t connect it directly to a PC to program it. However, you can choose between UART and SPI as a programmer.
- Download and install the ARDUINO IDE software. You can use the link below to install the software. https://www.arduino.cc/en/software
- Write the program in IDE. Note: The program in ARDUINO IDE is written in C language.
- To establish communication between Pro-mini and PC, connect the programmer.
- Then through IDE burn the program to pro-mini-board.
- Now, you can disconnect the programmer.
- After attaching the necessary peripherals and devices with the pro-mini-board, provide power to it.
- Once you reset, it will execute the program.
Hope you’ll get the desired output!
Note: After downloading and installing IDE, you need to do the following steps before uploading the code:-
- If you are using FTDI breakout, you need to install the drivers for it.
- After installing the drivers, we can start with uploading the sketches. For that, Open Arduino IDE. Then, go to File > Examples > 01.Basics > Blink
- To configure the system, Go to Tools > Boardand select Arduino Pro or Pro Mini.
- Then, go to Tools > Processorand select ATmega328 (3.3V, 8MHz)/ ATmega328 (5V, 16MHz).
- Tell the board which serial port you are using for FTDI breakout.
- Finally, click on the upload button.
After discussing how to use it, let’s have a look at some of its pros and cons after which you can check its compatibility with your project.
Pros & Cons of Arduino Pro Mini
Pros:
- This pro-mini is particularly designed so that you can permanently embed it in your project.
- Due to its favorable form factor, its power consumption is very low.
- It can be put into a portable device due to its smaller size.
- It is very light in weight.
- Slower speed allows better controllability.
- Cost-effective.
Cons:
- It does not have any USB port and other connectors.
- It does not have an inbuilt programmer.
Applications
Here are some amazing projects where you can use Arduino Mini Pro.
- Automatic Surface Disinfecting Robots
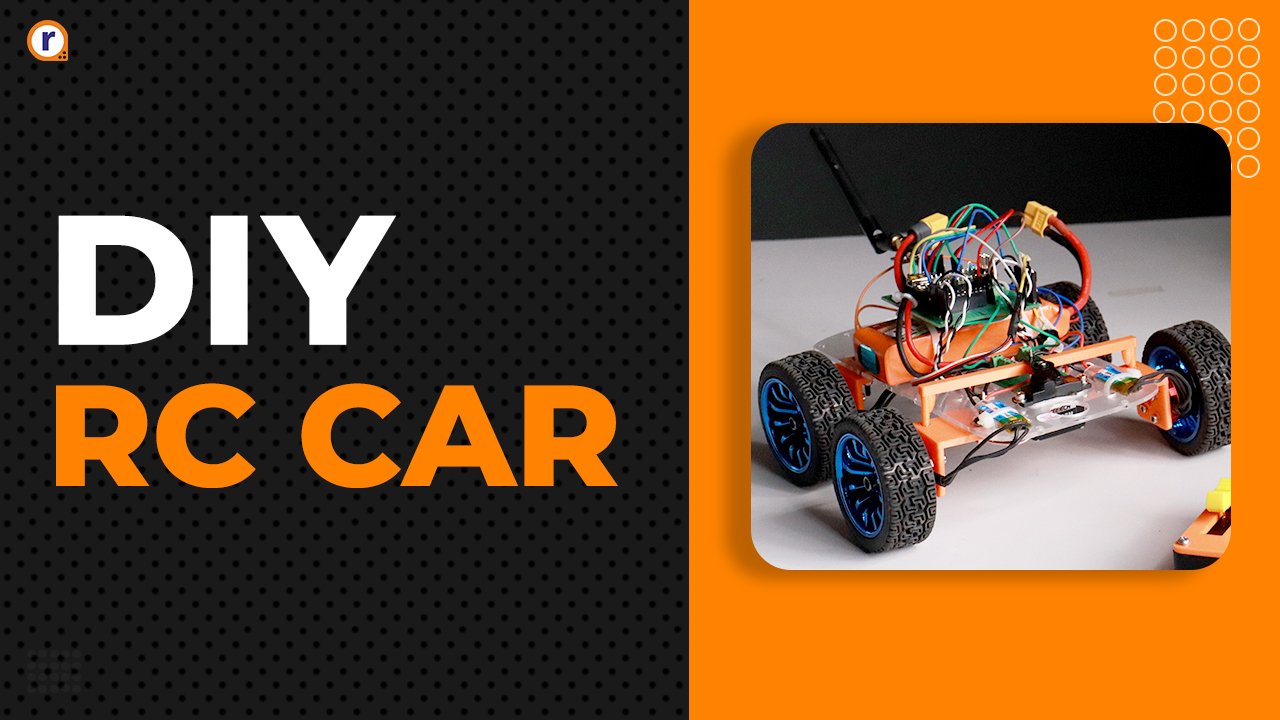
- Small remote control cars.
- Smart Watch
- Speedometer
- Compact Thermometers
- Line follower Robot
- Tachometer
Well, that's it folks. Hope you have learned more about what an Arduino Pro Mini is, what are its specifications, its applications, and its pro and cons. Watch this space for more.


