Create an eye-catching scrolling text LED display using Arduino UNO
Scrolling text led displays are a very useful when it comes to displaying text messages. Commonly they are seen at railway stations, at toll plazas, in train and in bus.
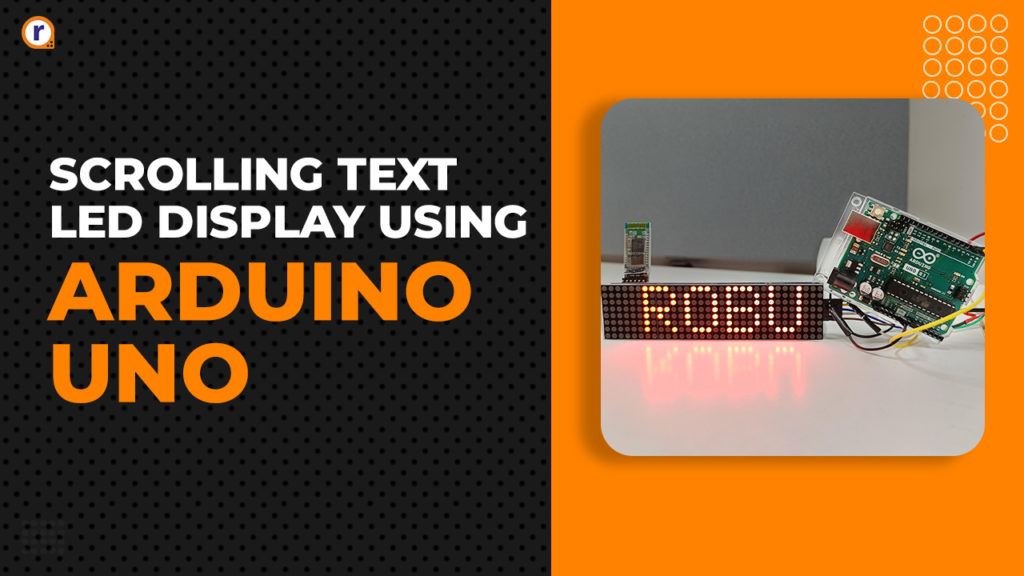
Scrolling text led displays are a very useful when it comes to displaying text messages. Commonly they are seen at railway stations, at toll plazas, in train and in bus. In general, they are used at places where text information needs to be shown to large number of people. The text information on led display can be updated by a computer or smartphone. The text message can be seen at day or night as the brightness can be adjusted. So let’s see how to make led display and updated messages from laptop or mobile phone.
Components required
- Arduino UNO
- MAX7219 display module
- HC-05 Bluetooth module
- 5V 2A power adapter
- Jumper wires (M to F) – 10 pcs
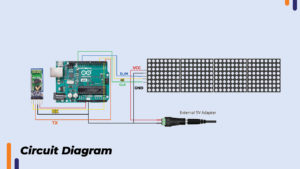
Connect the components according to below given circuit diagram
Circuit diagram
Hardware explanation
In this project we are using the (4 in 1) MAX7219 dot matrix display module. It consists of four 8 X 8 dot matrix display cascaded to form 8 X 32 dot matrix display. The MAX7219 module allows us to control (8 X 8) led matrix using simple SPI protocol. It has in-built static ram to store the data of all 64 led’s. The brightness of display can be controlled easily by MAX7219. It has got everything needed to control a led matrix display from a microcontroller. It is also used to drive the 7 segment displays and wherever, where we need to control 64 led’s.
It has 5 pins VCC, GND, DIN, CS and CLK. VCC and GND is given 5V and GND from the power adapter (5V 2A). As the module uses SPI protocol. The SPI pins on Arduino are 13(SCLK), 12 (MISO), and 11(MOSI). The DIN (data in) pin is connected to 13 (MOSI) Pin of Arduino UNO. CLK pin is connected to 12 (SCLK) and CS (Chip select) Pin is connected to 3 pin of Arduino UNO. The chip select pin can be connected to any Pin, just you need to update the variable in program.
The Bluetooth module HC-05 is used to make this project wireless. Using HC-05 we will be able to send text messages from a mobile phone app to MAX7219 display module. The HC-05 module communicates using the UART protocol, It has six pins EN, VCC, GND, TXD, RXD and STATE. The VCC and GND is connected to Arduino’s 5V and GND, RXD is connected to TXD of Arduino and TXD is connected to RXD of Arduino.
Once the connections are done, connect the Arduino UNO to the laptops USB COM port and open the Arduino IDE.
Installation of libraries in Arduino IDE
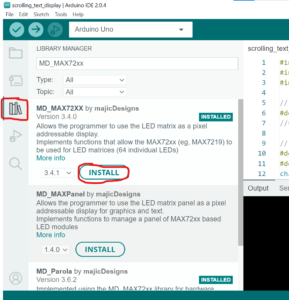
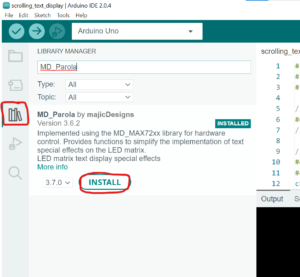
Before uploading the code we need to install the MD_MAX72XX and MD_Parola library by majicDesignes. Go to library manager and search for keywords “MD_MAX72XX” and “MD_Parola” install both the libraries. Refer the below given screen shots.
Now we are ready to install the code.
Code
#include <MD_Parola.h>
#include <MD_MAX72xx.h>
#include <SPI.h>
// Uncomment according to your hardware type
#define HARDWARE_TYPE MD_MAX72XX::FC16_HW // for module with blue PCB
//#define HARDWARE_TYPE MD_MAX72XX::GENERIC_HW
// Defining size, and output pins
#define MAX_DEVICES 4 // there are 4 modules in our display.
#define CS_PIN 3 // The pin on which chip select is connected.
char message[100] =""; // char array for storing typed message.
// Create a new instance of the MD_Parola class with hardware SPI connection
MD_Parola myDisplay = MD_Parola(HARDWARE_TYPE, CS_PIN, MAX_DEVICES);
void setup() {
// Intialize the object
Serial.begin(9600);
myDisplay.begin();
myDisplay.setIntensity(8);// Set the display brightness. Max is 15 and Min is 0
myDisplay.displayClear();
}
void loop() {
if(Serial.available()>0)
{
String mes = Serial.readString();
disp_name(mes);
Serial.println(message);
// disp_name(message);
myDisplay.displayScroll(message, PA_CENTER, PA_SCROLL_LEFT, 100); // scroll the message left to right with time interval of 100ms.
}
if (myDisplay.displayAnimate()) // run scrolling continuously
{
myDisplay.displayReset();
}
} // code ends here
void disp_name(String word) //convert String to character array.
{
for(int i=0; i<(word.length() - 1); i++)
{
message[i] = word[i];
}
}
After the code is uploaded. Open the serial monitor and type the message that you want to see on the led display and hit enter. You will see the message scrolling on the display.
Another way to send messages is by using the Bluetooth terminal app on our mobile.
Sending messages using Bluetooth app
The led on the HC-05 module starts to blink as soon as the circuit is turned on. The red led blinking indicates that the module is not connected to the Bluetooth. Follow the below given steps.
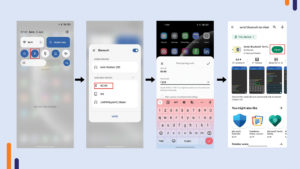
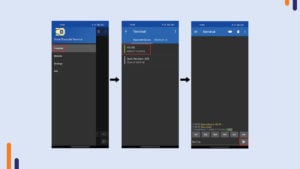
- Turn on the Bluetooth on your smartphone. When the scanning starts you will see HC-05 in available devices. Select HC-05 and enter the password “1234” , The HC-05 will now get paired with your phone.
- Download the “Serial Bluetooth Terminal” app from play store.
- Open the app >> Select “devices” >> There you will see HC-05 >> Select HC-05, you will be connected to the module.
- After you are connected the blinking on the HC-05 will stop.
Now you can send the message from the Bluetooth terminal app and it will be seen on the led display.
Note - Hit reset button on Arduino board before sending new message otherwise the messages will get overlayed.
Conclusion
In this way we made a scrolling text led display which can be controlled using laptop as well as from the mobile phone. If you have doubt regarding any part of this blog you can comment it. Our team will be there to assist you.
For more interesting electronics projects check out our YouTube channel.


