Raspberry Pi Zero 2W : Serial Communication with Arduino Made Easy
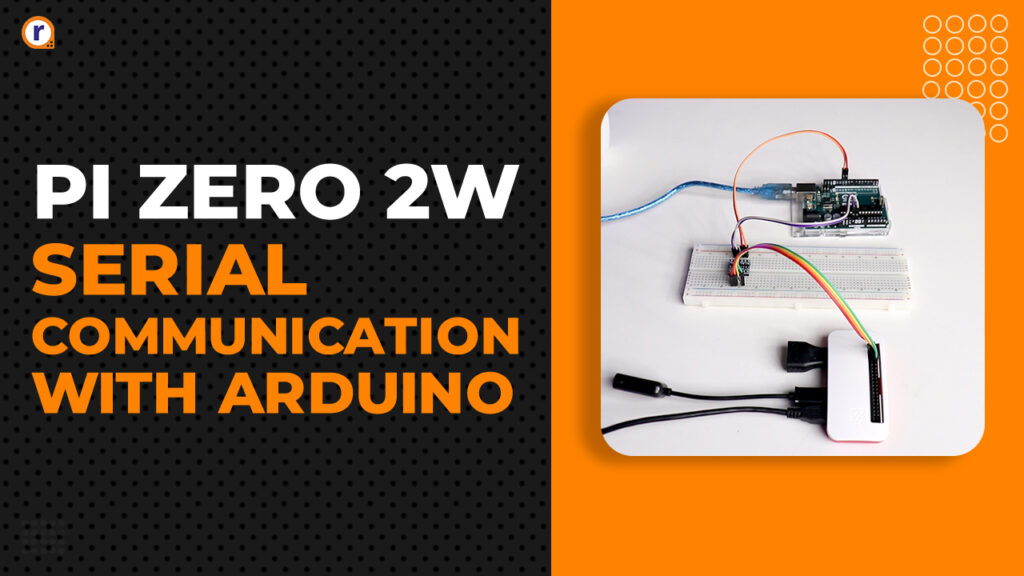
In this guide, we’re going to explore on how to send and receive data between Raspberry Pi Zero 2W and Arduino Uno specifically over UART Protocol i.e. Serial. How ever,

In this guide, we're going to explore on how to send and receive data between Raspberry Pi Zero 2W and Arduino Uno specifically over UART Protocol i.e. Serial. How ever, this process might be little different for different types of Raspberry Pi boards.
So without wasting any time, lets get started.
What is Raspberry Pi ?
It is a small, affordable, single-board computer developed by the Raspberry Pi Foundation. Designed initially for educational purposes, it provides a platform for learning programming and computer science. Over time, it has gained popularity among hobbyists and professionals for its versatility in various projects, such as home automation, media centers, robotics, and more.
The Raspberry Pi runs a variety of operating systems, most notably Raspberry Pi OS (formerly Raspbian), which is based on Debian Linux. It supports programming languages like Python, C, C++, Java, and others, making it an ideal tool for both beginners and advanced users.
The device features USB ports, HDMI output, GPIO pins for hardware projects, and network connectivity, making it a powerful and flexible tool for numerous applications.
Pi Zero 2W
The Raspberry Pi Zero 2W is a compact and cost-effective variant of the Raspberry Pi series, designed to offer significant performance improvements over its predecessor, the Raspberry Pi Zero W.
Released by the Raspberry Pi Foundation, the Pi Zero 2W retains the small form factor of the original Pi Zero models but its new features and enhanced specifications, making it more capable for various projects.
Features
- A quad-core 64-bit ARM Cortex-A53 CPU, which provides a significant performance boost compared to the single-core CPU of the original Pi Zero.
- 512MB of LPDDR2 SDRAM, sufficient for lightweight computing tasks and various IoT applications.
- Integrated 2.4GHz IEEE 802.11b/g/n wireless LAN and Bluetooth 4.2, offering robust wireless communication capabilities.
- CSI-2 camera connector, allowing the attachment of Raspberry Pi camera modules.
- Mini HDMI port for video output.
The Raspberry Pi Zero 2W is designed to be a low-cost, low-power solution suitable for projects that require a small form factor and modest computing power. Its improved performance and connectivity make it ideal for embedded applications, DIY electronics, portable projects, and educational purposes.
Hardware Requirements of this Project
- Raspberry Pi Zero 2W
- Pi Zero/ Zero 2W Case
- 32GB Micro SD Card
- Heat Sinks
- Cables
- Arduino Uno
- Bi directional Logic Converter
Software Requirements of this Project
- Arduino IDE
- Raspberry Pi Imager Tool
- Serial Package for python3
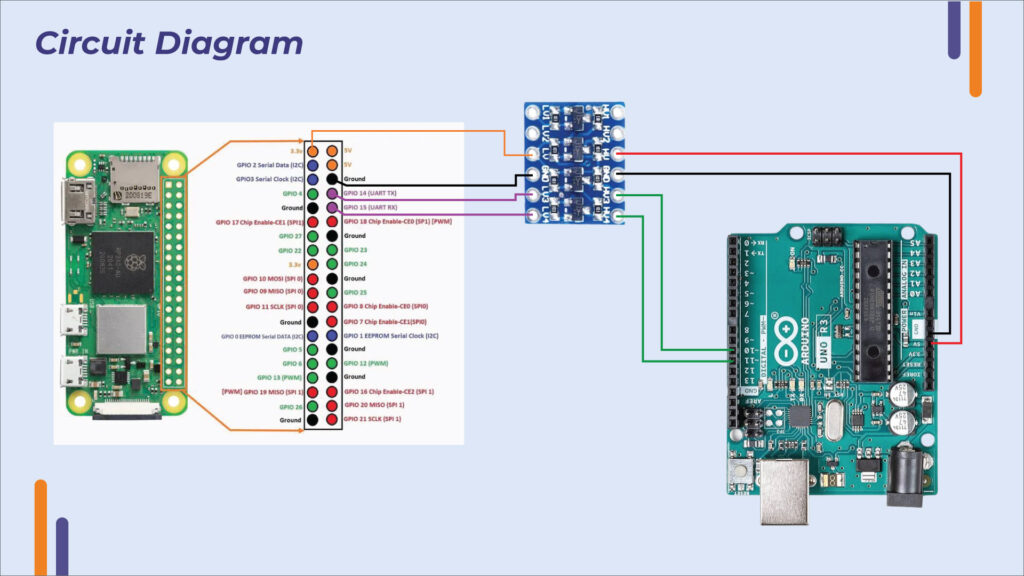
Circuit Diagram and Hardware Interfacing
Circuit Diagram

Hardware Interfacing
Raspberry Pi Zero 2W
|
Raspberry Pi Zero 2W |
Bi Directional Logic Shifter |
|
+3.3V |
LV |
|
GND |
LVGND |
|
RX |
L1 |
|
TX |
L2 |
Arduino Uno
|
Arduino Uno |
Bi Directional Logic Shifter |
|
+5V |
HV |
|
GND |
HVGND |
|
10 |
H2 |
|
11 |
H1 |
Coding
Firstly we need to SSH into the pi zero 2W or if you have attached display and keyboard to it, that would do too.
Non SSH:
Enter your username and password to login to your account which you've made using the setting up of the MicroSD card.
SSH:
To SSH into your pi, open CMD on your pc. And enter SSH [username]@[hostname]. Then it'll ask you to save the device if its the first time you're connecting via SSH. Enter yes and continue, it'll ask for your password. And you'll be in after you've entered the password which you've used during the setup.
Before you copy the following code, you need to do few things first. Which are not that important but good to do before hand.
Check for any update by running command:
sudo apt-get update && sudo apt-get upgrade -y
And we need to get an package for this which is pretty important. Get the package using the command:
sudo apt-get install python3-serial
And we need to check if serial is enabled or not on the Pi for that, run command:
ls -l /dev
And it'll give out a lists of all the devices. If you don't see device named 'serial0', then you need to enable it by going into the config menu of the raspberry.
Use the command to go to the configuration menu:
sudo raspi-config
And go into the Interface Options. Select Serial Port and select No on the 1st prompt and Yes on the 2nd prompt respectively. After that run the command ls -l /dev to check for the serial0.
Take a note of the device the serial0 is pointing to. It's important and we gonna need it later.
Making folders/directories for organized keeping of files:
mkdir [folder_name] :eg- mkdir Serial_Test
cd [the_same_folder_name]/ :eg- cd Serial_Test/
Create python file using the command:
sudo nano [file_name].py :eg- sudo nano Serial_Send.py
Now copy the code and paste it into the pi's editor and press ctrl+s and ctrl+x to save and exit the text editor.
First code we'll be looking at will be for the Raspberry Pi Zero 2W to send to Arduino
Raspberry Pi Zero 2W Send
Make sure that you replace the '/dev/ttyS0' with yours device to which serial0 is pointing to.
from serial import Serial
import time

arduino_serial = Serial('/dev/ttyS0', 9600, timeout = 0.1)
arduino_serial.flush()

while True:
        try:
                arduino_serial.write(b"ON\n")
                time.sleep(1)
                arduino_serial.write(b"OFF\n")
                time.sleep(1)

        except KeyboardInterrupt:
                arduino_serial.close()
                break
Arduino Uno Read
We'll be reading the mySerial line and print it over the Serial Monitor in the IDE
#include <SoftwareSerial.h>

SoftwareSerial mySerial(10, 11); // RX, TX

void setup() {
  Serial.begin(9600);
  mySerial.begin(9600);

}

void loop() {

  String data = mySerial.readStringUntil('\n');
  Serial.println(data);

}
Raspberry Pi Zero 2W Read
We'll be looking at an example where we read from Raspberry Pi Zero 2W. Make sure to change for the address '/dev/ttyS0' to what is your serial0 is pointing to.
import serial
import time

arduino_serial = serial.Serial('/dev/ttyS0', 9600, timeout= 0.1)
arduino_serial.flush()
while True:
    line = arduino_serial.readline().decode('utf-8').rstrip()
    print(line)
    time.sleep(1)
Arduino Uno Send
We'll be sending data over the mySerial line in here, and keep the default serial line free.
#include <SoftwareSerial.h>
SoftwareSerial mySerial(10, 11); // RX, TX

void setup() {
  mySerial.begin(9600);
}

void loop() {

  serial_send(1, 2, 3);
  delay(1000);

}

void serial_send(uint8_t x, uint8_t y, uint8_t z){
  Serial.print("A = ");
  Serial.print(x);
  Serial.print(" B = ");
  Serial.print(y);
  Serial.print(" C = ");
  Serial.println(z);
}
We've seen example's for both of the boards send and read. Now with slightly tweaking of the codes above, you can make projects where both of the boards communicate and executes the planned tasks.
Conclusion
Till now, we've seen all the prerequisites and cautions to be taken to avoid error's and unknown behavior of the codes. And with little bit of tinkering of the send and read examples, you'll be able to build complex projects requiring data exchange between Arduino and Raspberry Pi.
Why? Because Raspberry Pi lacks analog inputs which is present on Arduino, not to mention the wide support of almost all of the sensors and modules out of the box for Arduino.
So using Arduino's compatibility and Raspberry Pi's processing power, we would be able to make better and more robust systems at comparatively low prices.
- For more such Arduino and Raspberry Pi Pico based projects,
check out our Arduino Playlist and Raspberry Pi Pico Playlist
- And for other more interesting projects, check our main YouTube Channel


