
Programming Raspberry Pi Pico using Micro-Python
Raspberry Pi Pico became a very popular board due to its price tag and is very easy to start with Micro Python. Here will set up Pico for Micro Python.

Raspberry Pi Pico was launched recently. It became very popular due to its price and features. As we are moving forward in newer generations of controllers, we are observing cost-effective yet better-performing controllers. Here the Pico comes with an RP2040 chip, which the RaspberryPi Team developed. It is cheap, small, and draws very low power.
The Raspberry Pi Pico chip is a dual-core Arm processor (running at 133MHz), which also comes with 264KB of RAM, 26 GPIO pins, including three analog inputs, a micro-USB port, and a temperature sensor.
To run something on the Raspberry Pi Pico, it’s quite easy. You plug your device into your computer using the micro-USB port. You boot up the Raspberry Pi Pico while pressing the button. The device will appear on your computer as an external drive.
Installing MicroPython On Raspberry Pi Pico
The installation process of MicroPython on Pico is very easy. You need to go to the raspberry pi website and go to "Products> Pico > Get started > MicroPython section > UF2 file".
To cut the process short, I have uploaded the file to my Github. You can click this link to download it.
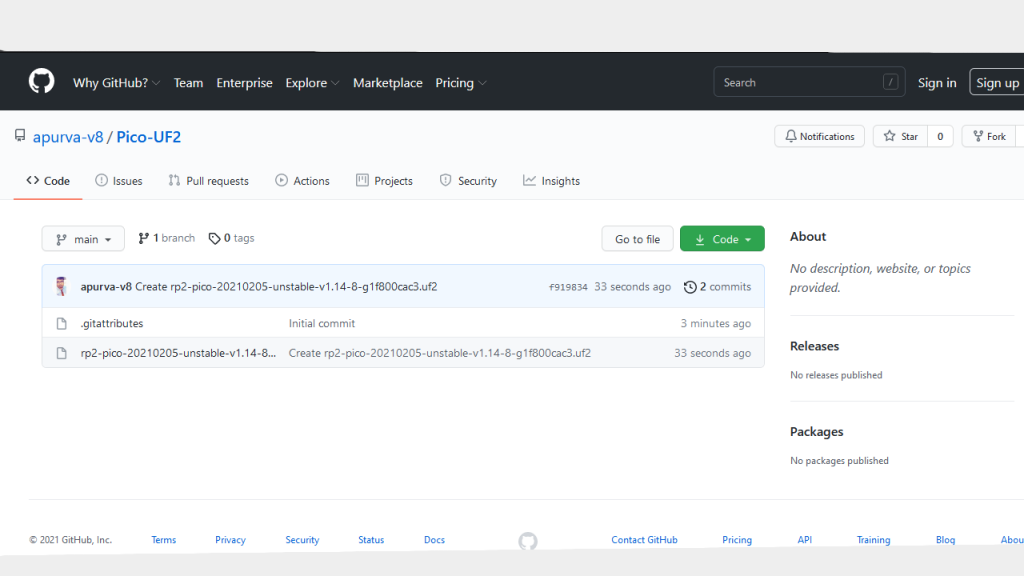
Once the download is completed, extract the file, and you will see the uf2 file as shown in the above image.
Press the BOOTSEL button, and while pressing, connect it to the PC using a micro USB port given on the pico.
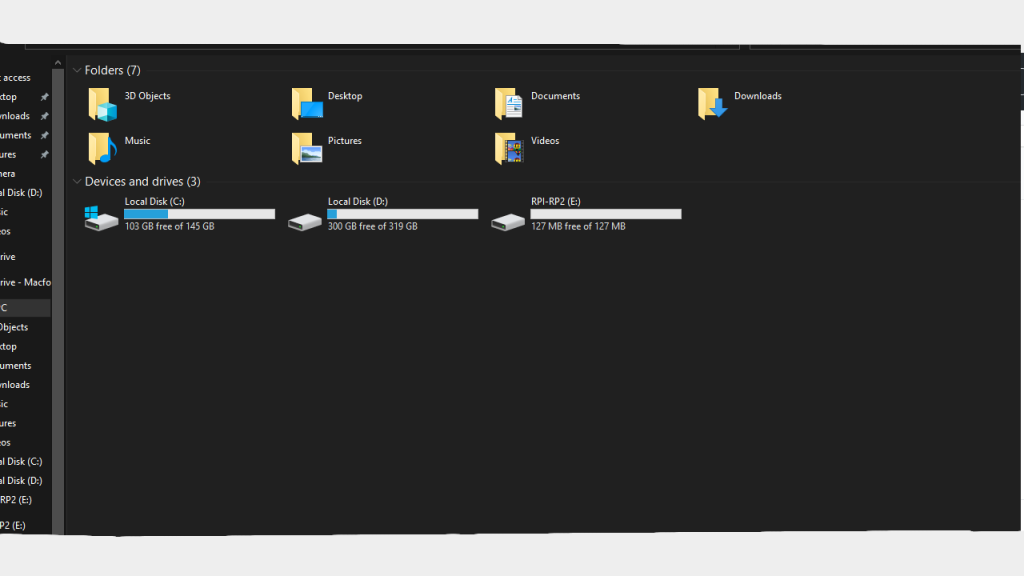
After connecting to the PC, you will see something like the below image. It will show as a mass storage device with 127MB of Space.
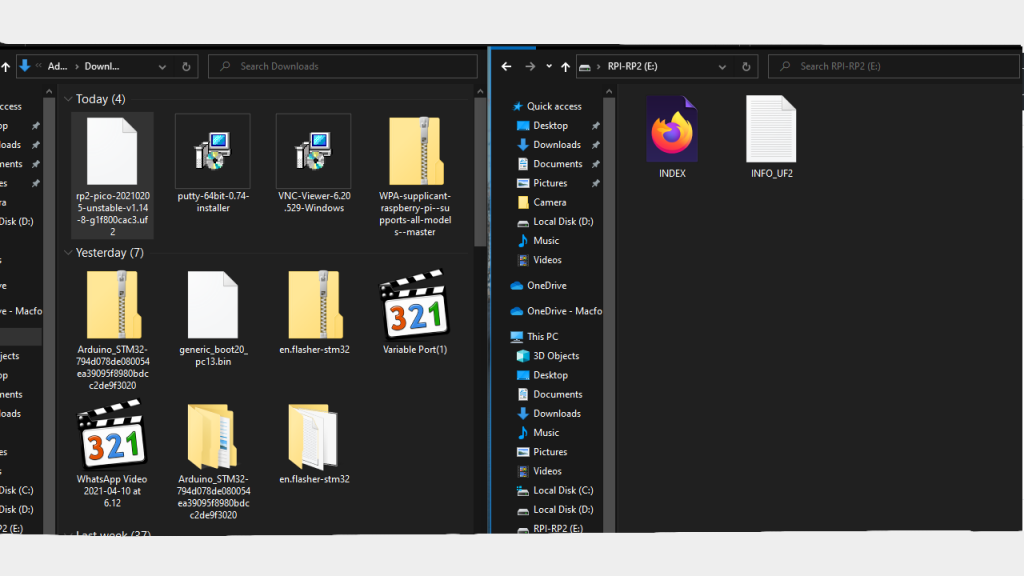
Then open the pico storage, you will see something like on the right-hand side. Now, paste the uf2 file you downloaded. The pico will reboot itself and go into MicroPython mode.
When these initial steps are done, you can move further to check if the Micro Python is installed properly.
Accessing MicrPython REPL (Read, Evaluate, Print, Loop)
To code on Pico on Micro Python, we need to ensure that Python is installed properly on our computer. You can download Python from here.
While Python installation, you will need to make sure to tick on "add to path" as shown in the below image.

After python installation, we need an IDE to code on it. Here I am going to download Thonny Python IDE. You can download it from here.
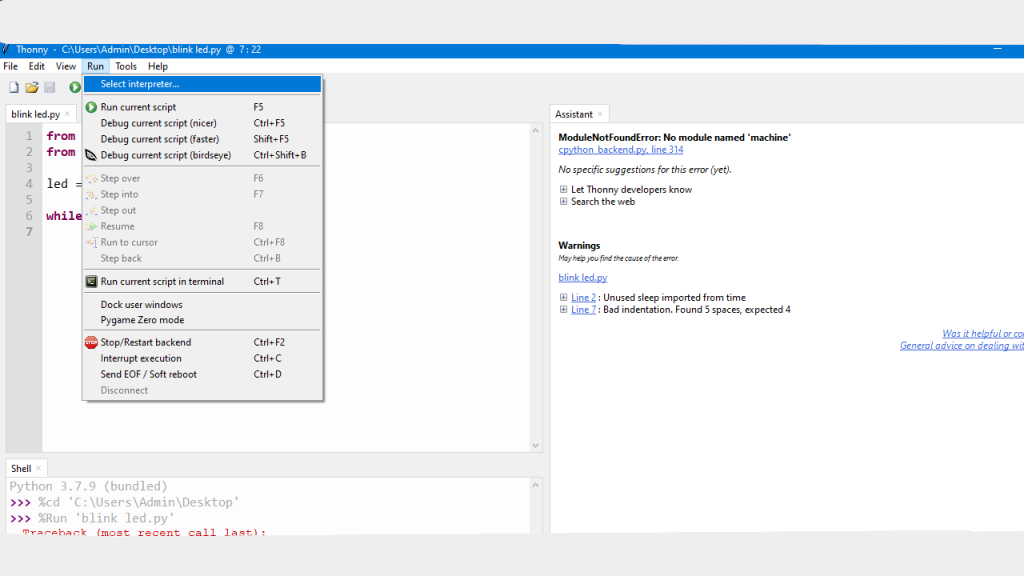
When downloaded and set, open the IDE and go to "Run> Select Interpreter" as shown in the below image.
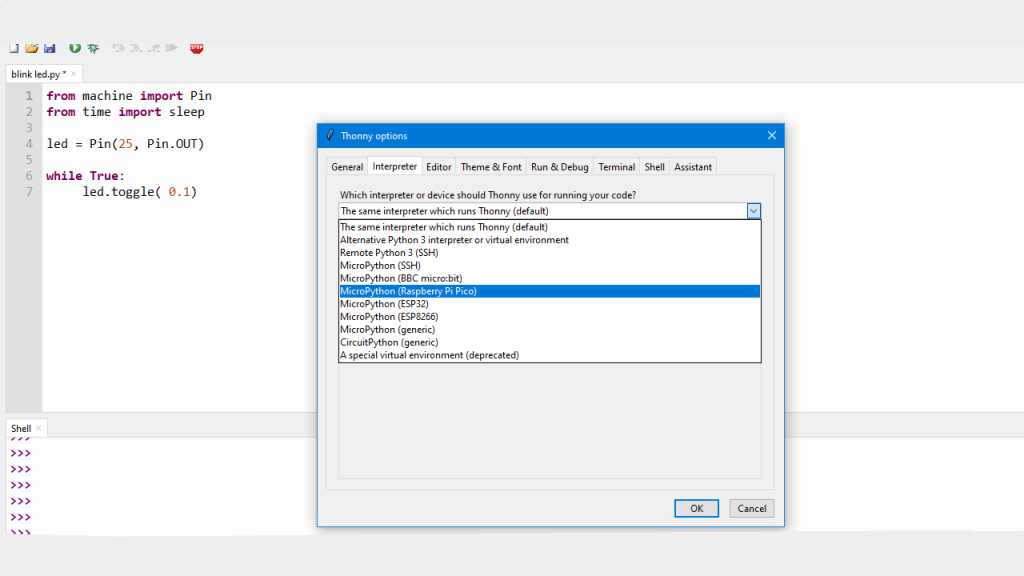
Select Micro Python Raspberry Pi Pico here in the interpreter list as shown in the below image.
We select Raspberry Pi Pico, and select the COM port it is connected to.
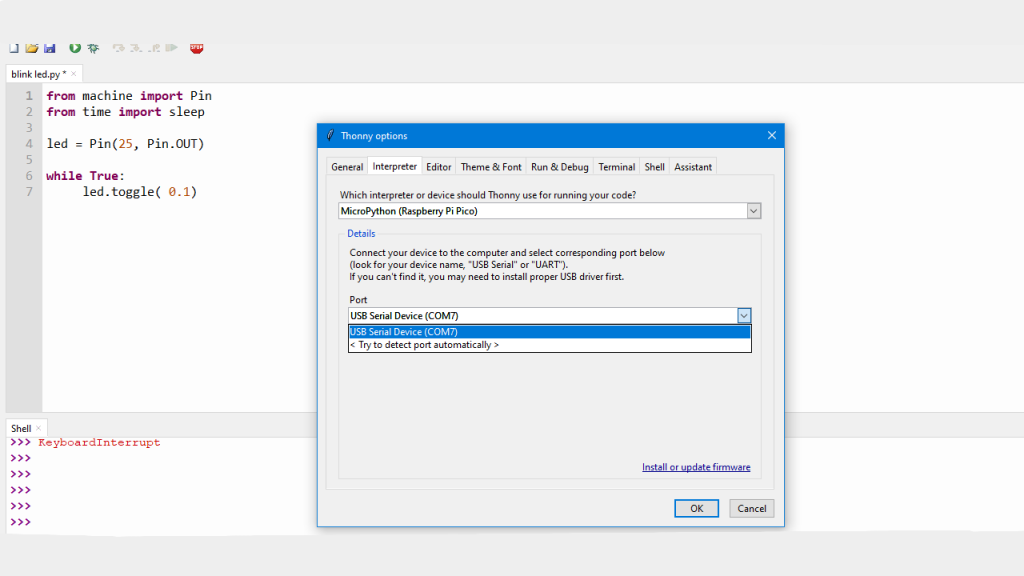
Here my Pico is on COM7. To check this, you can open the device manager and see disconnecting and connecting which port the Pico is connected to. Select Your Raspberry Pi Pico COM port here. Now you can start programming.

I will test it here by using the print command as shown above. The Pico is executing the print command I have used above. This way, we can test if the setup of MicroPython is successful. You can see the output in the above.
Programming the Pico
Programming the Pico is very simple with micro Python once you've set up the above. That is the only thing we need to start programming with pico. You can do various sorts of code and try using the full capability of the Pico with your code. Pico can also be programmed via C language.
We have made a series of videos on programming tutorials, which you can check by clicking this link. This series is specially made for the Pico board. It will help you set up the board with C and Python. We have also done a program in the video to test the onboard temperature sensor.
We will now move towards writing a blink LED sketch. Blinking LED is like hello world for electronics hardware people. :)
Testing (Blinking On-board LED)
You can see in the below image that I've written the blink code. I will put the explanation below.
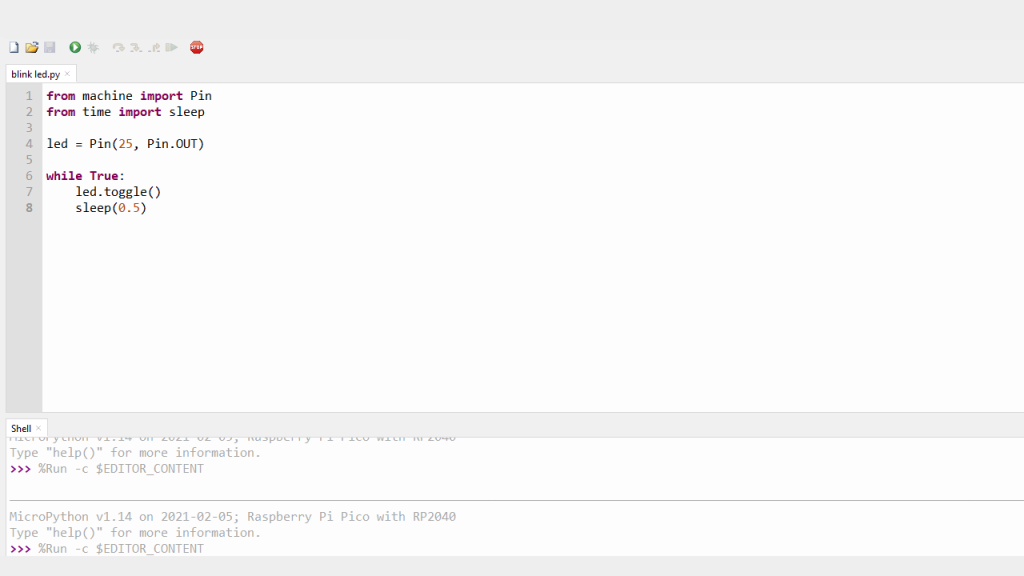
Here, I've put the explanation in the comment lines. You can directly copy-paste the below code and save it in Python format or get it from this Github link.
from machine import Pin #Import Pin from the machine as we are using LED pin
from time import sleep #Import Sleep from Time as we need for delay

led = Pin(25, Pin.OUT) #The on board LED on Pico is on Pin 25

while True:
     led.toogle() #changing state of LED
     sleep(0.5) #delay between Toogle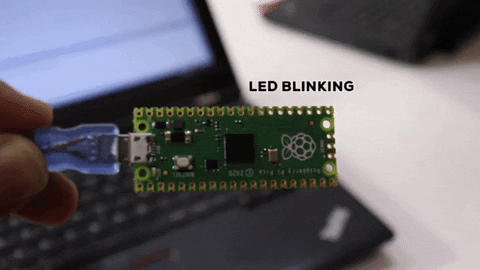
You can see the LED blink on the board in the above GIF.
Final Words
Programming on Pico using Micro python is a very easy-to-do process. Anyone can start programming in few minutes. The board is cheap and comes with lots of features. I am hoping to see this board stand out in dev boards like Arduino for the long haul. See you next time. Sayonara. Stay Safe.
About Robu
India's biggest robotics E-commerce company. Robu deals with Arduino, Raspberry Pi, Sensors, Drone parts, 3D printer parts, E-bike accessories and Electronics components etc. Click here to explore range of Robotics products available at Robu. Also, do not forget to follow us on Facebook, Instagram and YouTube because we are constantly contributing to the community by creating content around Arduino, Raspberry Pi, Drones, Sensors etc.
Related Posts

DIY - Foot Operated electronic Sanitizer Dispenser Project
Wednesday December 2, 2020 2018 Views
Safety during these times has become very crucial. In pandemic situation everyone is stuck at their place trying to be safe and working with maximum precaution possible, there are many... Read More

How to Build a Brushed Quadcopter: A Step by Step Guide
Tuesday December 8, 2020 8479 Views
The brushed quadcopter is the rare one which is used as an indoor quadcopter. This guide will give you step by step instructions on how to assemble it.... Read More

Interfacing of Piezoelectric Sensor with Arduino
Friday June 5, 2020 14560 Views
The tutorial, covers the working and interfacing of piezoelectric sensor with Arduino.... Read More

SP Racing F3 Flight controller Setup
Monday March 30, 2020 7992 Views
This guide takes you through the SP racing F3 flight controller setup in the cleanflight, step-by-step process.... Read More