Orange Raspberry Pi 4 Basic Kit
The Raspberry Pi 4 is a brand-new, super-fast minicomputer. On which we can run any popular programming language in order to perform our day-to-day tasks. If you’re new to the Raspberry Pi world and don’t want to run into any issues while configuring your Raspberry Pi board, this blog is for you.

Good day, Geek!! Welcome back to this blog, where we will discuss about the Orange Raspberry Pi Basic Kit and how to install the Raspbian operating system on the Raspberry Pi 4 Board.
As you may be aware, the Raspberry Pi has grown in popularity in recent years due to its high-quality features and applications, as well as its multi-language support.
The Raspberry Pi provides many benefits that small-scale micro-controllers cannot. Features include multi-language support, an easy-to-use IoT environment, and more. These features facilitate the work of the programmer.
Raspberry Pi 4 GPIO Pins
GPIO stands for general-purpose input-output pin.
We use GPIO pins to link the development board (Raspberry Pi) to the rest of the world. In this case, connecting to the outside world entails connecting several sensors to the development board.
A sensor attached to the development board detects the data and sends it to the Raspberry Pi, which processes it according to the code you wrote.
Talking about the maximum input and output voltage, the Raspberry Pi, like the Arduino DUE, does not tolerate voltage levels higher than 3.3V.
This means that you can't use a sensor that requires a voltage higher than 3.3V on a Raspberry Pi.
When it comes to amperage, the Raspberry Pi 4 can deliver a maximum of 16ma on each GPIO pin.
In addition to simple input and output function, the GPIO pins of the raspberry Pi also supports Advance communication protocols such as I2C, UART, CSI and SPI. I have mentioned the pin numbers of those protocols in the below section please take a look.
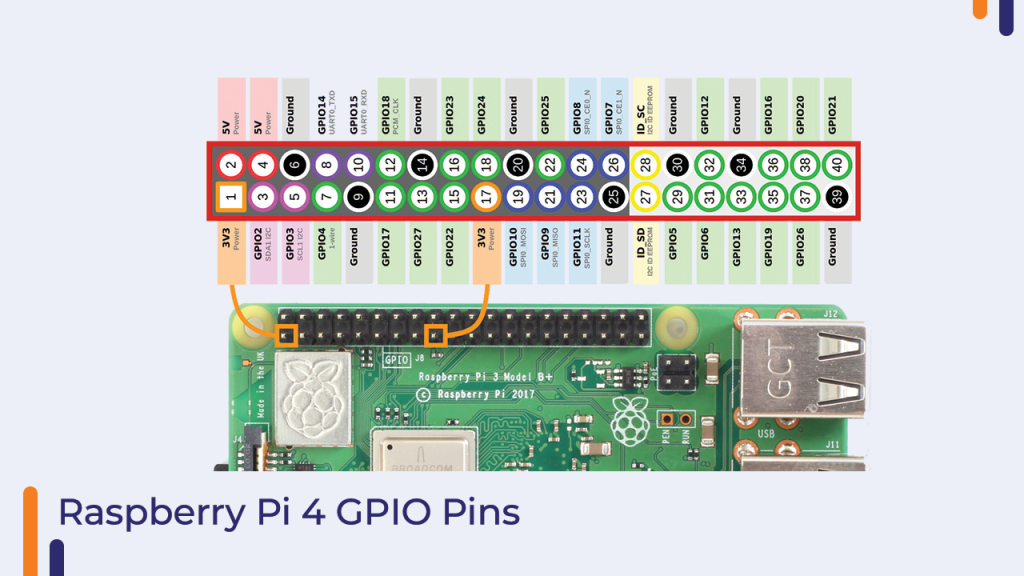
I2C Communication Protocol
- I2CData = (GPIO2), Clock = (GPIO3)
- EEPROM Data = (GPIO0), EEPROM Clock = (GPIO1)
SPI Communication Protocol:
- SPI0:
- MOSI (GPIO10),
- MISO (GPIO9),
- SCLK (GPIO11),
- CE0 (GPIO8),
- CE1 (GPIO7)
- SPI1:
- MOSI (GPIO20),
- MISO (GPIO19),
- SCLK (GPIO21),
- CE0 (GPIO18),
- CE1 (GPIO17),
- CE2 (GPIO16)
UART Communication Protocol:
- TX = (GPIO14)
- RX = (GPIO15)
Getting Started With The Raspberry Pi 4
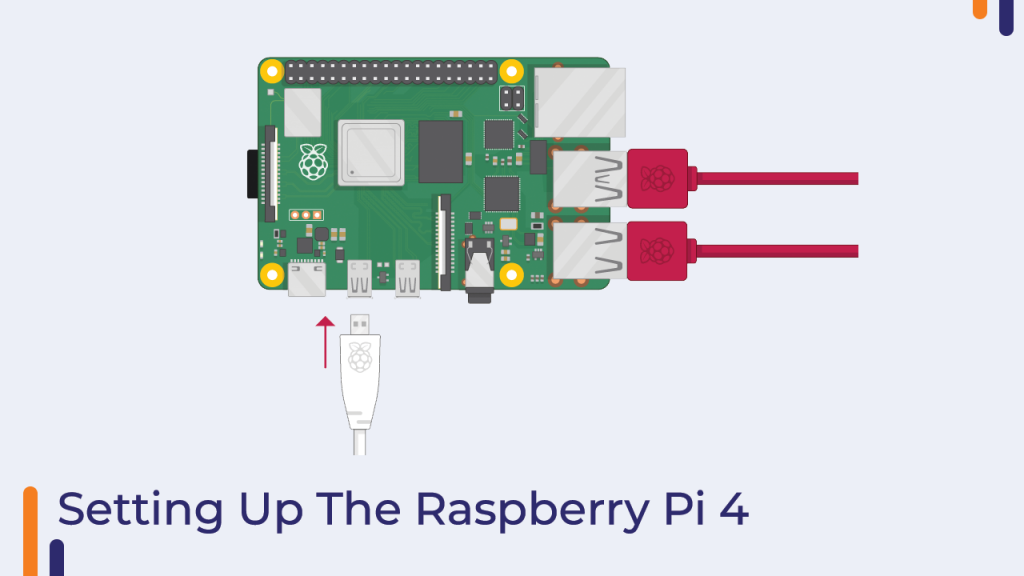
In this section, we'll go over how to install the Raspbian operating system on the Raspberry Pi.
Even if the process of installing the OS appears to be simple, we may encounter issues such as not booting or a few other driver-related issues.
However, if we carefully follow the steps outlined below, we can address these types of issues.
So, let's take a look at what those steps are.
Step 1: Placing The Raspberry Pi
It is critical to place the raspberry pi in the correct location. Raspberry Pi should not be placed near a liquid source because there is a risk of spilling over.
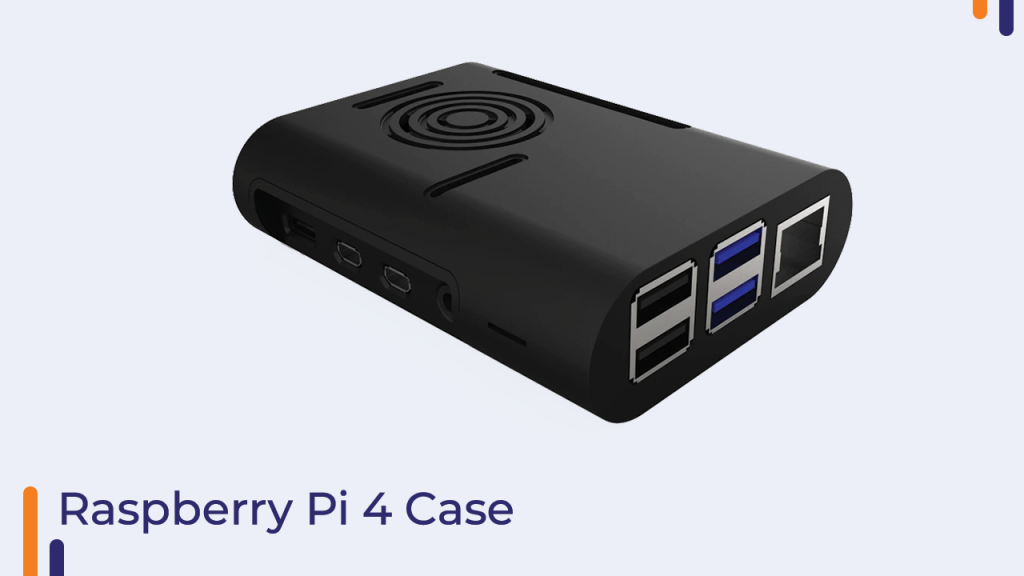
Because the Raspberry Pi does not come with a case, they are bare boards that can cause problems if not properly cared for. Before turning it on, please do not place it on a metal or conductive surface.
Make sure to discharge your hands before touching the raspberry pi, as our hands contain static charges that can harm or even kill small components. Touching any conductive surface will discharge your hands.
Step 2: Connecting The Power Adapter
Many people in this area use a different adapter with the Raspberry Pi. I recommend that you use the official Raspberry Pi adapter; third-party adapters are not properly rated. They have the ability to kill your pi.
The raspberry pi can accept input voltages ranging from 4.75VDC to 5.25VDC. Anything above this point may cause damage to the Pi. It requires a 3Amp adapter for the Pi 4b, 400, and 2.5Amp for models 3B+ and below.
The Type C Ports are supported by the 4b and 400, the newer Pi models. Simultaneously, the older models have a micro USB port. Before powering on, make sure nothing is touching the GPIO pins, as they are very sensitive and can kill the pi if not used properly.
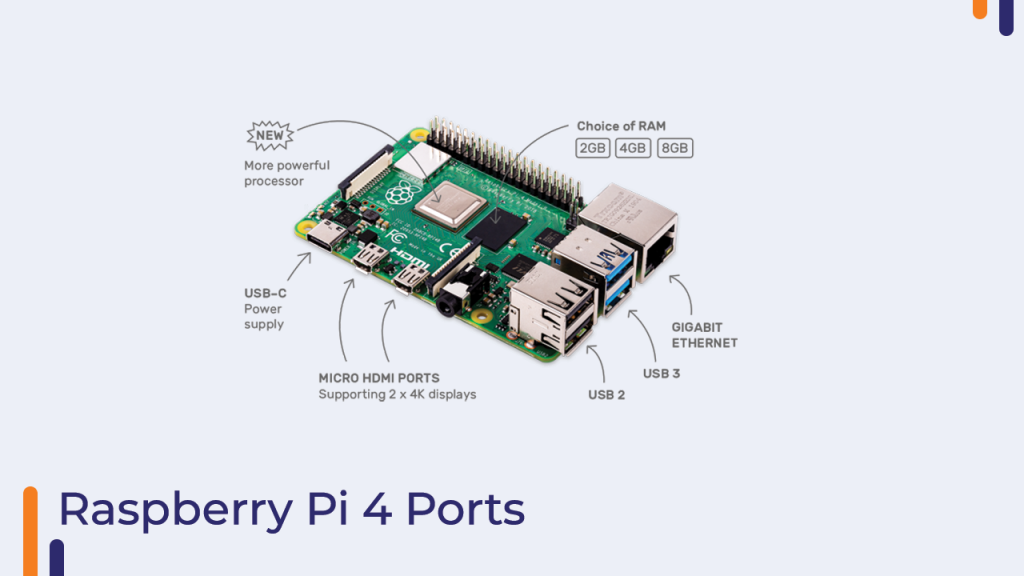
Step 3: Connecting HDMI Cables
- The official cable is recommended because it is extremely durable and fits correctly. You can use the cable that comes with the kit because it is of standard quality.
- Many third-party converters available in the local market have issues as well, so please check them before purchasing. It could be the cause of your inability to see the display.
Step 4: Installing The OS in SD Card
- The operating system can be installed in a variety of ways. Win32Disk Imager is my preferred method for correctly and error-free installation of the operating system.
- Now, proceed with the steps below to install the Raspberry Pi OS on the Raspberry Pi OS.
Click on This Link To Download The OS.
- You can download any of the listed operating systems, but I recommend that you download the Raspbian OS.
- Raspbian OS is the best-optimized operating system for the Raspberry Pi. If you use another operating system, you may experience stutters and lags from time to time.
- You use any tool that can format the SD in FAT32 Format. For example, if you are using a 64GB SD card, it comes in SDXC, so you will need to format it in exFAT.
- Raspbian is the best-optimized system for the Raspberry Pi. If you use another operating system, you may occasionally experience stutters and lags.
- I personally tried it. All you need is the Raspberry Pi OS file that you downloaded. When you have that, click on the image, and it will begin to extract it to your SD card. Pulls out the SD card after extraction; now you'll need a PC.

- Extract the ISO file via 7 zip or any other tool hand now you will get a .img file.
- You can download any image extractor program like Win32DiskImager, Balena Etcher, etc. I prefer the Win32DiskImager. You need to connect your SD card to your Laptop via an SD adapter, or you can plug it with any MicroSD Card Reader. and start extracting the ISO file you got from the download page of the Raspberry pi.
- Open Win32 Disk Imager and select the .img file and press the write button.
Conclusion: Orange Raspberry Pi 4 Basic Kit Getting Started
In this way, we learned how to interface in order to flash the OS to the Raspberry Pi Board. If you have any questions about any of these sections, please leave them in the comments section.


