Interfacing RFID Sensor-Complete guide for User.
We are in a world where access is seamless, payment is effortless, convenient stores are smart. This is all possible because of RFID, the technology that gives wireless reading.

We are in a world where access is seamless, payment is effortless, convenient stores are smart. This is all possible because of RFID, the technology that gives wireless reading.
So, we will also try this system and make RFID-based Access management using RC522 RFID Raeder, Tag and Arduino.
Introduction to RFID
RFID(Radio frequency identification)technology has become revolutionary in modern world, used in various applications like NFC payment, metro card, self check out store, and automatic toll gates. In this blog , we will dive into the working of RFID technology, its advantage over traditional method like barcode and QR codes, and demonstrate how to create a simple access management system using Arduino.
Understanding RFID
RFID is based on two main components RFID tag and RFID readers. Tags are active (required power) or passive (no power required), The passive tags are more commonly used due to their cost effectiveness.
The are consist of chip and antenna, while reader includes a controller chip with RF signal generator and receiver.
When a tag comes into the rage of reader .it receives power via magnetic or electromagnetic waves and transmits its data.
RFID are based various frequencies, with the most common
- LF(125-134KHz)
- HF(13.56MHz)
- UHF(840-960 MHz)
Advantages of RFID over barcodes and QR codes, including
- Longer reading distance (up to 20 meters)
- RFID does not line of sight/vision
- Longer lifespan
- Has ability to scan Multiple tags simultaneously
- Higher storage capacity (64kbits for RFID compared to limited storage of QR)
Creating access control system with Arduino
To demonstrate the practical application of RFID technology, we will interface an RFID reader with an Arduino to create a basic access management system
Hardware requirement
Software requirement
- Arduino IDE
Circuit diagram
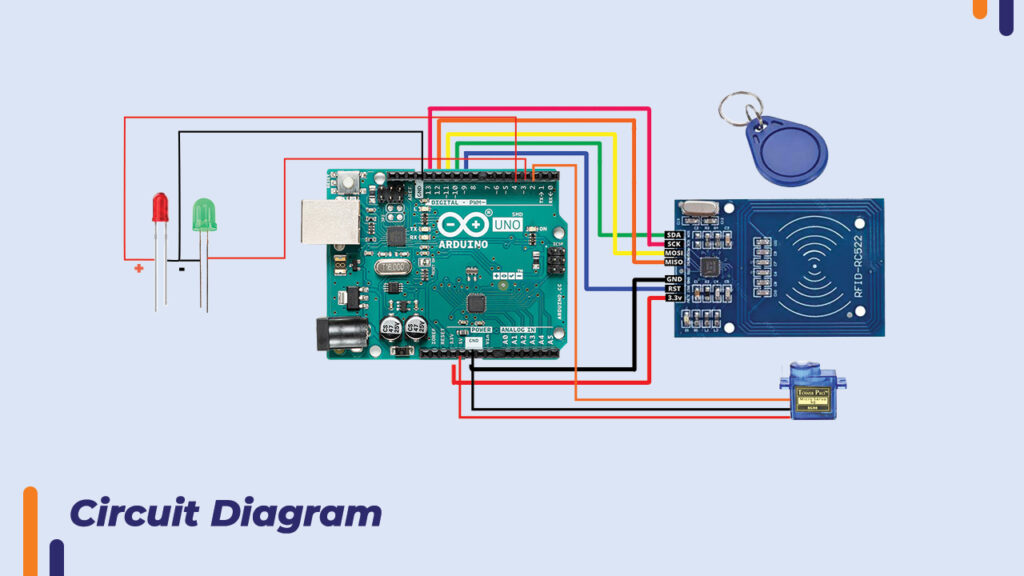
Code
let’s understand code we have written for this system
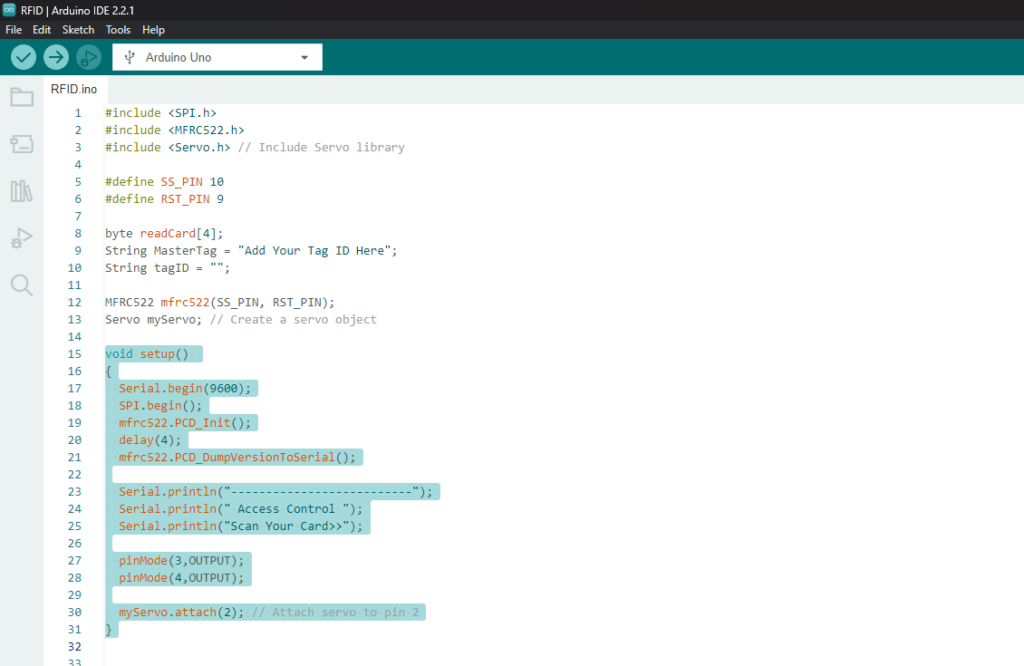
We included the require library in code,
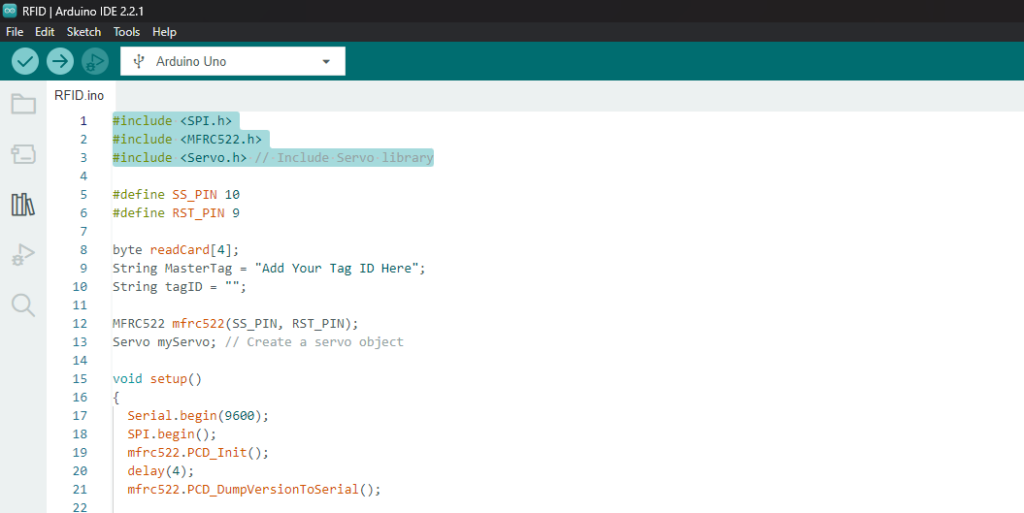
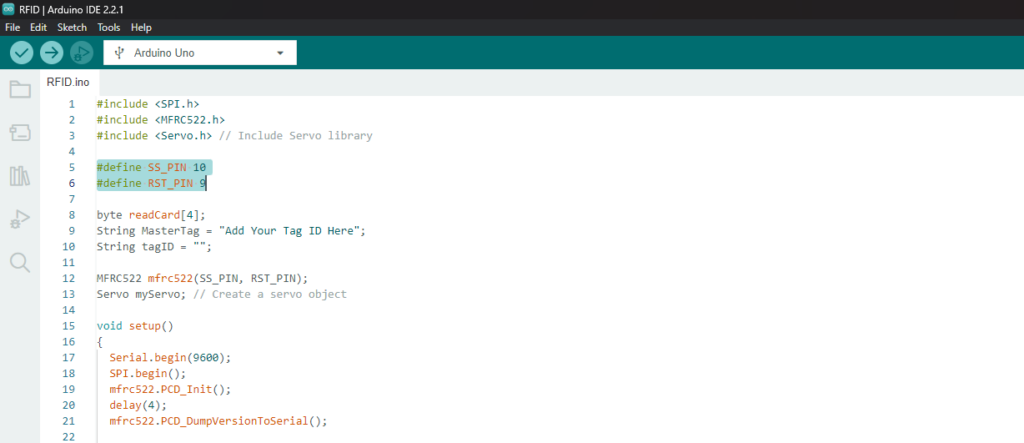
Defined the RST and SS PIN of reader to 9 and 10 pin of Arduino
Added tag UID in string variable, and setup SS and RST pin
Create my servo object for servo control
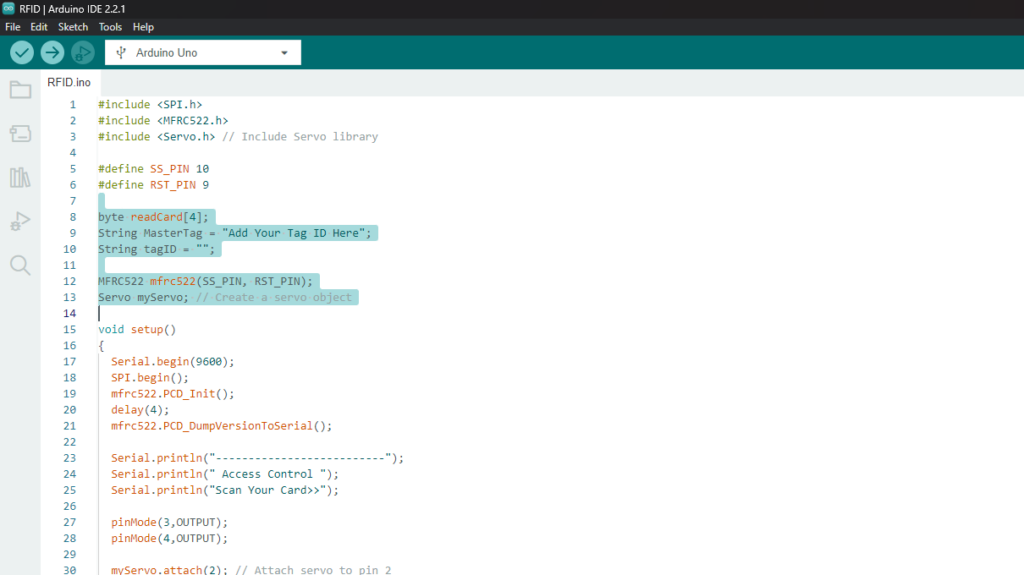
Then added the loop and initialized the serial communication to display the output on serial monitor, initialized the SPI for RFID reader with 4msec delay ,
then defined pin 3 and 4 for output LEDs and PIN 2 for servo ,
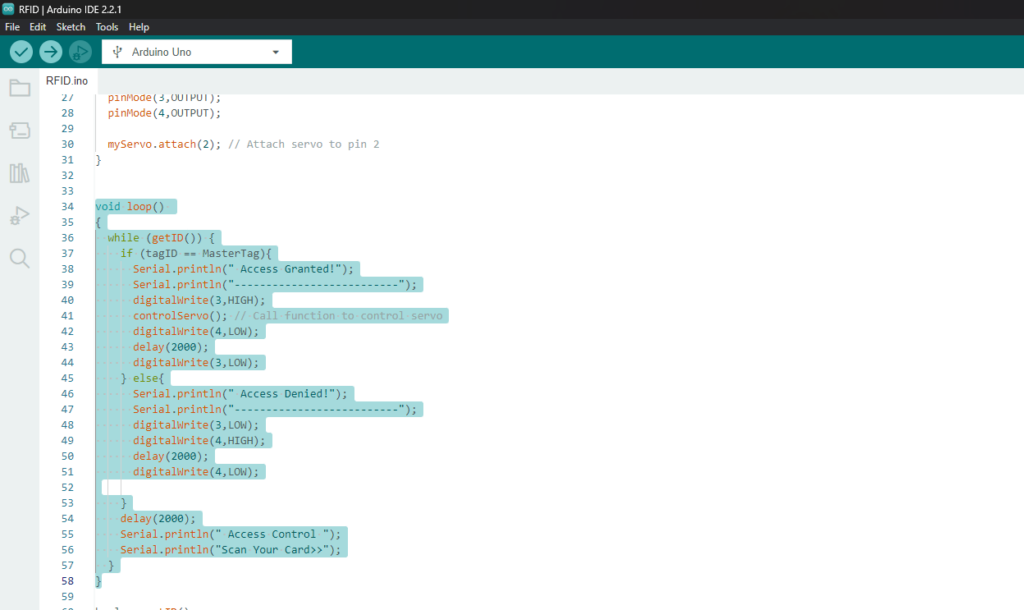
Added the access control conditional loop to grant and deny access( i.e. if set tag id matches master tag ID grant access and and digital write pin 3 high to which green led is connected and called control servo function which will control the servo with delay of 2 sec and if id does not match pin 3 will be low and pin 4 will high to which red LED is connected,
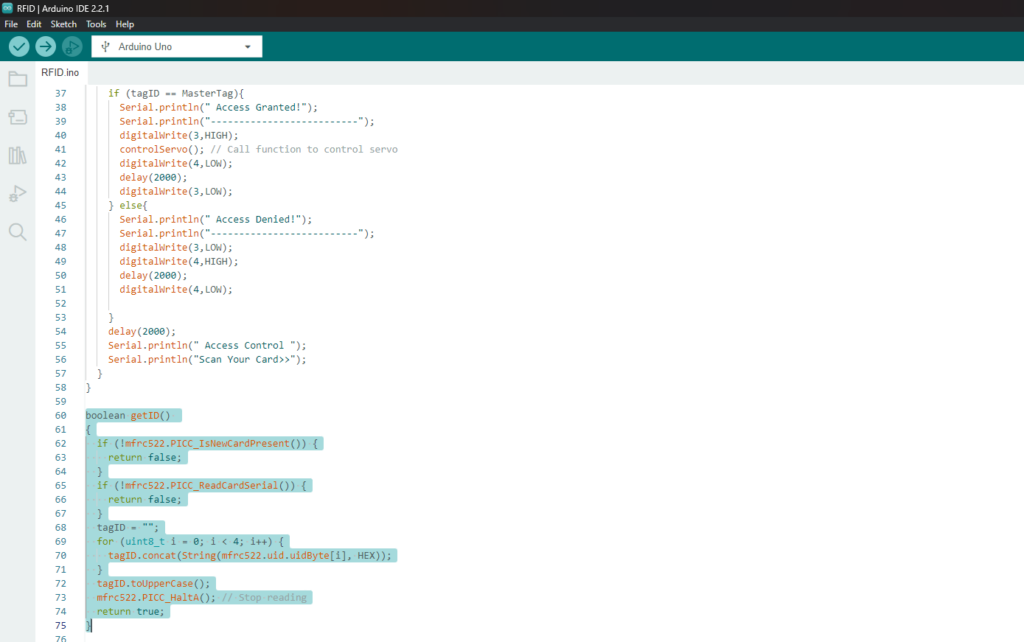
next is this get Id function which will return the ID of scanned tag
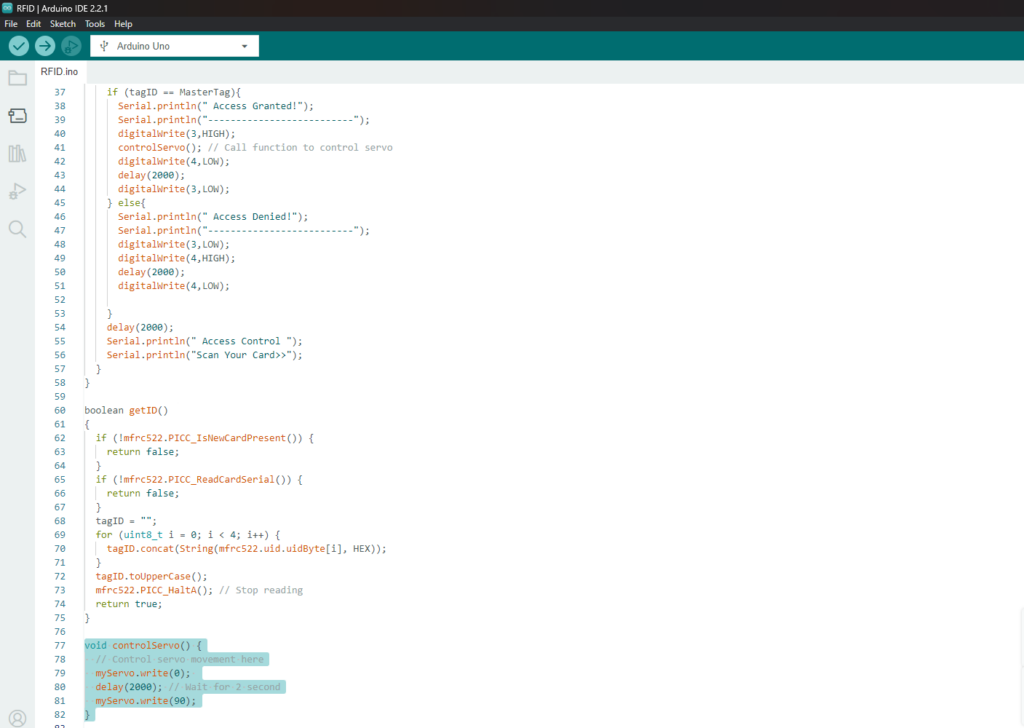
and this is control servo function which perform 90 degree servo rotation and return back after 2 seconds when called.
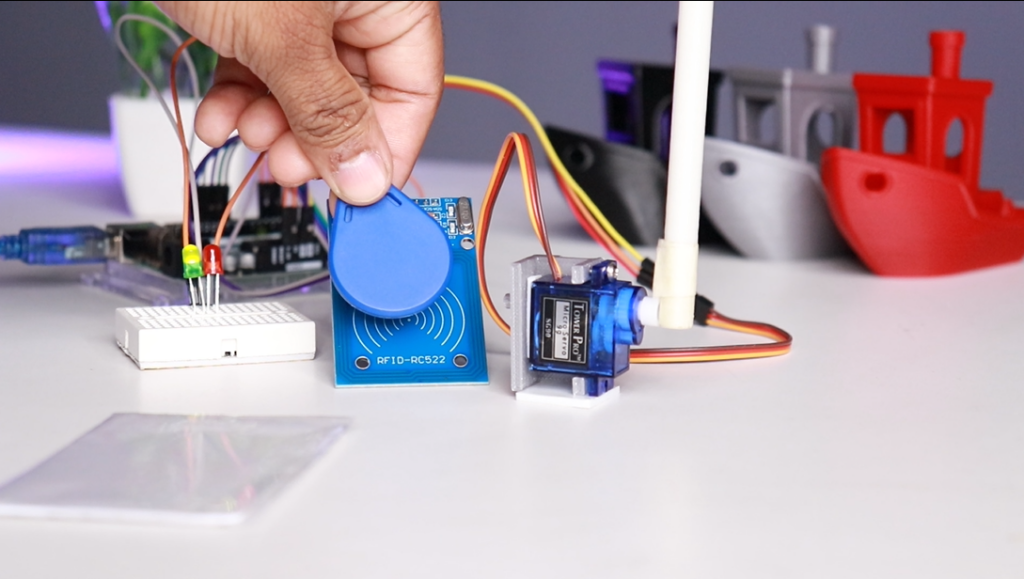
code is ready and connection are done ,connected Arduino to PC and upload the code. Place the tag near the reader and we can see that access is granted to known tag and servo motor is activated with green LED but if unknown tag or card is placed on reader it denies the access and turns Red LED ON .
Link for Full Code is Here- https://github.com/Robu-In/RFID-Access-System-Code
Procedure
Connect the RFID reader to Arduino as instructed in circuit diagram
Upload the provided code to the Arduino, which incudes libraries, pin definitions, setup, and conditional loops for access control
Place the RFID tag near the reader to grant access.
Conclusion
The capacity of RFID technology to track and uniquely identify objects has transformed several sectors. Its uses are numerous and extensive, ranging from access control and transportation to inventory management. You can experiment with RFID's features and develop unique solutions for your projects by connecting it to Arduino. Unlock RFID's potential and use this adaptable technology to improve your DIY projects.
For more fascinating Arduino and RFID projects and tutorials, subscribe to our channel. Await our upcoming technological adventure!
Watch video here- https://youtu.be/DP2-hOlF3xs
Related blogs- https://robu.in/easy-diy-rfid-door-lock-using-rpi-pico/
https://robu.in/arduino-rfid-based-door-lock-security-system/
https://robu.in/rfid-and-password-based-door-lock-system-using-arduino/


An invaluable resource for navigating the intricacies of RFID technology. Thanks for providing this comprehensive guide—we’re eager to learn how to effectively integrate RFID sensors into our projects and applications