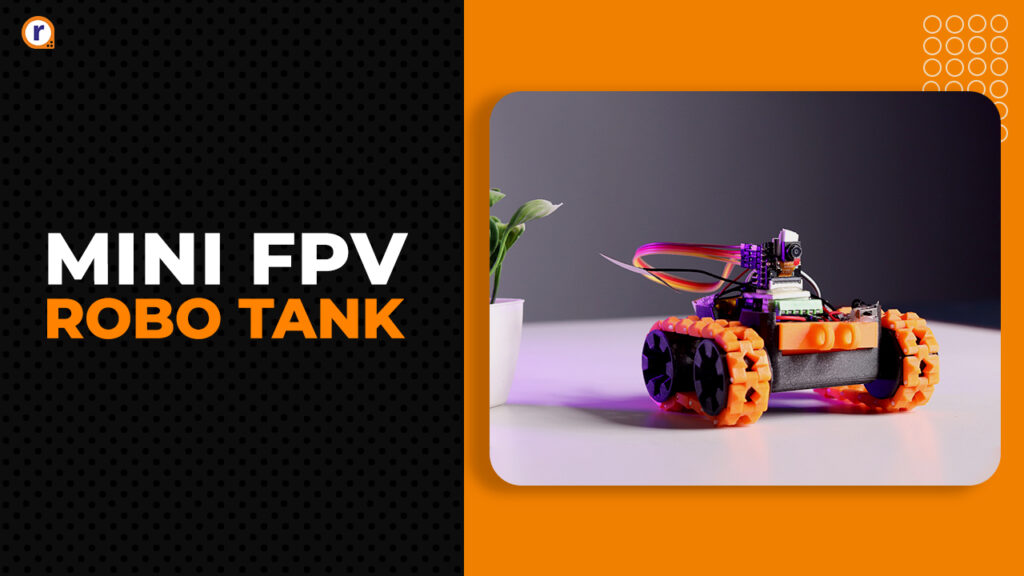
Build your own 3D printed DIY FPV mini robo tank using Seeed Studio XIAO ESP32S3 Sense
Hey everyone welcome back to an interning blog today we are going to build awesome FPV Robo tank using Seeed Studio XIAO ESP32S3 Sense, which can be controlled using local

Hey everyone welcome back to an interning blog today we are going to build awesome FPV Robo tank using Seeed Studio XIAO ESP32S3 Sense, which can be controlled using local server based remote controller.
read this complete blog and you will get detail information on how to build this awesome Robo tank.
So, without any further delay let’s get started
Let’s start with
Seeed Studio XIAO ESP32S3 Sense
Seeed Studio XIAO ESP32S3 Sense is powerful board similar to Seeed Studio XIAO ESP32S3 but this sense model has OV2640 camera sensor module which is detachable which enable the use of this board in application such as image processing, Video Monitoring, and many more and other feature are similar to Seeed Studio XIAO ESP32S3 you can read more about these board on seeed studios official website
Link: - https://www.seeedstudio.com/XIAO-ESP32S3-Sense-p-5639.html
The documentation is detailed and well written great work by seeed studio due to which there not much Hassel for interfacing.
Components requirement
- Seeed Studio XIAO ESP32S3 Sense
- LM239D motor driver
- N20 motors
- 3.7 LiPo battery
- 9 v battery
- Jumper wires
- Battery connector
- Switches
- Some 3D printed parts like (wheels, chassis, battery holder, wheel tracks)
- Soldering iron
- Soldering wire
- Type C cable
- Bread board

Software requirement
- Arduino IDE
- Prusa slice
3D printing
- Chassis x 1 Black
- Connector x 2 orange
- Holder x 1 orange
- Master wheel x 2 Black
- Mechanical track x 32 orange
- Slave wheel x 2 Black
Link- https://github.com/Robu-In/FPV-ROBO-TANK
Download the STL file from above GitHub link which contain all the STL file
Upload it to slicer of your 3d printer place the print proper on plate select the proper infill and other setup and slice it

Convert it to G code

And transfer the G code to SD card
And insert the SD card into to the printer
Power on the printer
3D print will start

Wait till completion of print and remove the prints after completion
3D print on robu.in
If you do not have 3d printer or you are unaware of 3d printing technology
No worriers
You can place 3D printing part order on robu.in
The process is simple
You just need to upload STL files of 3D print one by one select the infill, material, color and quantity and add it to cart after add all file check out pay and order will be placed
Refer this blog for detail process - https://robu.in/iot-pulse-oximeter-seeed-studio-xiao-esp32c3-max30102/
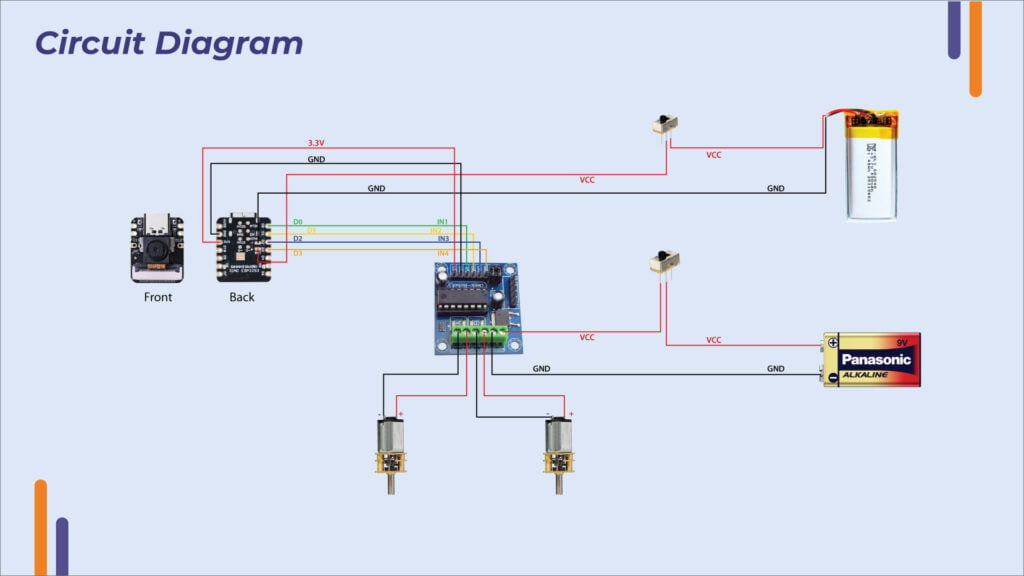
Circuit design

Components assembly
Connect all the components as shown in circuit design above
Provide supply to driver for motors and supply to board from 3.7 LiPo battery

Code
Compile and upload the given code in S3 sense board
Full code on :- https://github.com/Robu-In/FPV-ROBO-TANK
Before uploading select the proper board from bord manager Provide the name and password for connection
app_httpd.cpp
After uploading the code connect your device to Robo tank name and password will be same as you mention in code once the device is connected open your browser and print the IP which is displayed on serial monitor 192.168.4.1 and control panel will be open with camera stream.
Final setup
Now its time for final assembly let’s build the 3d Robo tank model and place all the component in it accordingly
image is given below for reference
Use double sided tape or hot glue to place and fix the component on there places
Connect your device to
Tank take the control and Drive


Conclusion
That how we have made this FVP Robo tank which is control using server control panel and which provides Live stream we can improve the speed by using high RPM motors and powerful batteries.
Video on:- https://www.youtube.com/@RobuInlabs
More videos playlist :- https://www.youtube.com/@RobuInlabs/playlists.
All resources on:- https://github.com/Robu-In/FPV-ROBO-TANK


Good blog.