Easy SmartElex 5 Environmental Sensors and Modules interfacing
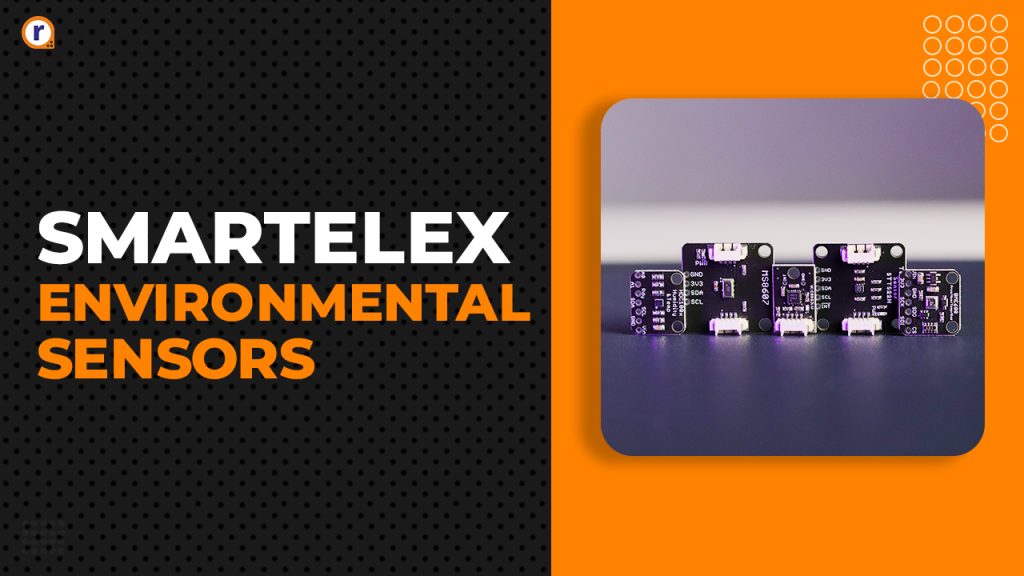
We are pleased to present the SmartElex temperature, humidity, pressure, weather, and magnetometer sensors. Welcome to the world of smart digital environmental sensors. Keep reading till the end as we

We are pleased to present the SmartElex temperature, humidity, pressure, weather, and magnetometer sensors. Welcome to the world of smart digital environmental sensors. Keep reading till the end as we compare these sensors with generic sensors and interface them with Arduino in this blog post.
What are Environmental Sensors?
Have you ever imagined how temperature is measured in a thermometer, how digital compasses show us the right direction the answer is sensors. Using various environmental sensor these devices can measure and display us various environmental parameters such as temperature, humidity, pressure, moisture, magnetic field and many more.
The Environmental sensors are designed and manufactured for measurement of various Environmental parameter such as temperature, humidity, pressure, vibration, Moisture, gas, smoke, air quality which can be used to collect and monitor the data which can utilize for IOT application, industrial application.
Hardware requirement
- SmartElex Temperature sensor
- SmartElex Humidity sensor
- SmartElex Pressure sensor
- SmartElex Weather sensor
- SmartElex Magnetometer
- Arduino Uno with cable
- Jumper wires
- Breadboard

Software requirement
- Arduino IDE
Temperature sensor
Let’s start with our favorite Temperature sensor It is based on STTS22H these are some specifications of sensor
- I2C port and I2C interface.
- Four addresses that can be chosen 0x3C, 0x3E, 0x38, 0x3F, and default
- Temperature range for operation: -40 to +125
- Maximum accuracy of temperature: ± 0.5°C (-10°C to +60°C)
- Working voltage range: 1.5–3.6 V
- 3.3V is typical when using an I2C port.
- 1.75µA ultralow current in one-shot mode
- Adjustable limits with interrupt pin
- Operating modes that can be programmed
It can be used to precisely measure the temperature
Below is the Interfacing image


After interfacing select the proper port, upload the following code and make sure all the required libraries are installed
Code for SmartElex Temperature sensor:
#include <Wire.h>

#include "SparkFun_STTS22H.h"


SparkFun_STTS22H mySTTS;


float tempF;  // Temperature in Fahrenheit

float tempC;  // Temperature in Celsius


void setup() {

    Wire.begin();

    Serial.begin(115200);


    if (!mySTTS.begin()) {

        Serial.println("Did not begin.");

        while (1);

    }


    Serial.println("Ready");


    mySTTS.setDataRate(STTS22H_POWER_DOWN);

    delay(10);

    mySTTS.setDataRate(STTS22H_1Hz);

    mySTTS.enableAutoIncrement();

    delay(100);

}


void loop() {

    if (mySTTS.dataReady()) {

        mySTTS.getTemperatureF(&tempF);  // Get temperature in Fahrenheit

        tempC = (tempF - 32) * 5 / 9;    // Convert to Celsius


        Serial.print("Temp (F): ");

        Serial.print(tempF);

        Serial.print("F");


        Serial.print("\tTemp (C): ");

        Serial.print(tempC);

        Serial.println("C");

    }

    delay(1000);

}
Humidity Sensor
Let's interface humidity sensor next This humidity sensor is based on HDC100X below are some specifications
- Digital Sensor for Temperature and Humidity
- Operating range for relative humidity (RH): 0% to 100%
- Accuracy of relative humidity: HDC1008 +/-4%, HDC1000 +/-3%
- Accuracy of temperature: +/-0.2°C
- Interface I2C (address: 0x43, ADR0=1, ADR1=1)
- Logic Level and Power Supply: 3.3V to 5V
Interface according to image shown


After interfacing select the proper port, upload the following code and make sure all the required libraries are installed
Code for SmartElex Humidity sensor:
#include <Wire.h>

#include "Adafruit_HDC1000.h"


Adafruit_HDC1000 hdc;


void setup() {

  Serial.begin(9600);

  Serial.println("HDC100x test");


  if (!hdc.begin()) {

    Serial.println("Couldn't find sensor!");

    while (1);

  }

}


void loop() {

  Serial.print("Temp: "); Serial.print(hdc.readTemperature());

  Serial.print("\tHum: "); Serial.println(hdc.readHumidity());

  delay(500);

}
To view output open serial, monitor with appropriate baud rate
Pressure Sensor
Pressure sensor It has BME680 some of the key features are
- Voltage
- range of operation 1.71V to 3.6V
- Comparative Humidity
- Range of operation: 0% to 100%
- RH ±3% Absolute Accuracy
- Accuracy: ±0.008%RH
- The temperature
- Range of operation: -40°C to +85°C
- Accuracy in Absolute: ±0.5°C to ±1.0°C
- 0.01°C is the resolution.
- pressure
- Range of operation: 300 hPa to 1100 hPa
- Relative accuracy: ±12Pa (25°C to 40°C at constant relative humidity)
- Precision to the absolute: ±60Pa (0°C to 65°C)
- 0.18 PA resolution with maximum oversampling
- Gas
- Gas sensor resistance resolution: 0.05% to 0.11%
- Average current usage (varies according to active sensor and mode)
- 2.1µA to 18mA
- 0.15 µA (mode of sleep)
To interface connect the pin according to image shown below


Select the right board and port and upload the give test code
Code for SmartElex Pressure sensor:
#include <Wire.h>

#include <Adafruit_Sensor.h>

#include "Adafruit_BME680.h"


Adafruit_BME680 bme;


void setup() {

  Serial.begin(9600);

  while (!Serial);


  if (!bme.begin()) {

    Serial.println("Could not BME680 sensor, check wiring!");

    while (1);

  }

}


void loop() {

  if (!bme.performReading()) {

    Serial.println("Failed to perform reading :(");

    return;

  }


  Serial.print("Temperature: ");

  Serial.print(bme.temperature);

  Serial.println(" *C");


  Serial.print("Pressure: ");

  Serial.print(bme.pressure / 100.0);

  Serial.println(" hPa");


  Serial.print("Humidity: ");

  Serial.print(bme.humidity);

  Serial.println(" %");


  Serial.println();

  delay(2000);

}
To view output open serial monitor with required baud rate
Weather Sensor
Next is weather sensor, which is based on MS8607,it is basically a PHT(pressure, humidity, temperature)sensor and its features are
Range of Operation:
10–2000 mbar
Humidity range: 0% to 100%
-40 to 85°C
Precision (at 25°C):
±2mbar of pressure
Humidity variation of ±3%
±1°C
Result:
0.016 bar
Humidity: 0.04 percent
0.01 degrees Celsius
0.78uA is the supply current (1Hz, 1024 OSR).
0.03 uA of standby current
Time of Conversion (PHT): 4m
Follow the image circuit for interfacing


Select the right board and port and upload the give test code
Code for SmartElex Weather Sensor:
#include <Wire.h>

#include <Adafruit_MS8607.h>

#include <Adafruit_Sensor.h>


Adafruit_MS8607 ms8607;


void setup() {

  Serial.begin(115200);

  while (!Serial);

  Serial.println("Adafruit MS8607 test!");


  if (!ms8607.begin()) {

    Serial.println("Failed to find MS8607 chip");

    while (1) { delay(10); }

  }


  Serial.println("MS8607 Found!");


  ms8607.setHumidityResolution(MS8607_HUMIDITY_RESOLUTION_OSR_8b);

  ms8607.setPressureResolution(MS8607_PRESSURE_RESOLUTION_OSR_8192);


  Serial.println("Resolution settings configured");

  Serial.println("");

}


void loop() {

  sensors_event_t temp, pressure, humidity;

  ms8607.getEvent(&pressure, &temp, &humidity);


  Serial.print("Temperature: "); Serial.print(temp.temperature); Serial.println(" degrees C");

  Serial.print("Pressure: "); Serial.print(pressure.pressure); Serial.println(" hPa");

  Serial.print("Humidity: "); Serial.print(humidity.relative_humidity); Serial.println(" %rH");

  Serial.println("");


  delay(500);

}
To view output open serial monitor with required baud rate
Magnetic Sensor
Now let's interface magnetometer which is based on MMC5983MA its feature is
- 2.8–3.6 V is the supply voltage
- 1µA current for power down
- Three-axis magnetic sensor fully integrated
- Dynamic accuracy and range:
- ±8G FSR
- 18-bit functionality
- Total RMS noise of 0.4 mG
- Allows for ±0.5º heading accuracy
- Maximum data rate of 1000 Hz output
- Sensitivity compensation on-chip
- Temperature sensor integrated into the chip
- I2C Address: 0x30
- One I2C Horizontal Connection Port
Make connection according to image given below


I2C PORT PIN

Upload the test code given below by selecting the proper port
Code for SmartElex Magnetometer sensor:
#include <Wire.h>

#include <SparkFun_MMC5983MA_Arduino_Library.h>


SFE_MMC5983MA myMag;


void setup() {

    Serial.begin(115200);

    Serial.println("MMC5983MA Example");


    Wire.begin();


    if (!myMag.begin()) {

        Serial.println("No respond - check wiring. Freezing.");

        while (true);

    }


    myMag.softReset();


    Serial.println("MMC5983MA connected");

}


void loop() {

    double heading = calculateHeading();

    Serial.print("Heading: ");

    Serial.println(heading, 1);

    delay(100);

}


double calculateHeading() {

    uint32_t rawValueX, rawValueY, rawValueZ;

    double scaledX, scaledY, scaledZ, heading;


    myMag.getMeasurementXYZ(&rawValueX, &rawValueY, &rawValueZ);


    scaledX = (double)rawValueX - 131072.0;

    scaledX /= 131072.0;


    scaledY = (double)rawValueY - 131072.0;

    scaledY /= 131072.0;


    scaledZ = (double)rawValueZ - 131072.0;

    scaledZ /= 131072.0;


    heading = atan2(scaledX, 0 - scaledY);

    heading /= PI;

    heading *= 180;

    heading += 360;


    return heading;

}
To view output open serial monitor with required baud rate
We are going to Interface SmartElex Sensors with Arduino and test them with Generic Sensors
Results
Here we have used DHT22 for SmartElex Temperature & Humidity sensor , BMP180 for SmartElex Pressure and Weather sensor , HMC5883L for SmartElex Magnetometer
DHT22 is digital temperature and humidity sensor module which is generic module used for measuring temperature and humidity when tested with SmartElex Temperature and Humidity sensor SmartElex totally overpowered the generic with Accuracy and precision
BMP180 is a Board Mount Pressure Sensors which can be used to measure pressure, Temperature as well as altitude When tested with SmartElex Pressure sensor and Weather sensor SmartElex sensors were more reliable with high accuracy.
HMC5883L is a magneto resistive sensor circuit which can be used to measure magnetic field generally it is used for digital compass when compared with SmartElex Sensor , SmartElex was more sensitive and accurate
We have interfaced these sensors with Arduino Uno to test them with SmartElex sensors the reading of SmartElex sensors were more precise.
Conclusion
So here we have interface and test the SmartElex temperature, humidity, pressure, weather and magnetometer sensor with Generic Module Like DHT22(Temperature and humidity sensor), BMP180(Pressure and Temperature), HMC5883L (Magnetometer) using Arduino Uno, the SmartElex Sensors are high precision and provide reliable data.
Watch on YouTube: -https://youtu.be/GQzpD5_MGzM


Good article