In this article, we are going to analyze two PH sensors. One is Gravity analog PH sensor, and another one is a seed studio PH sensor, how to interface them with Arduino.

A pH meter is a scientific instrument that measures the hydrogen ion concentration in the solution to decide its acidity and alkalinity. The pH meter measures the difference between the electrical potentials of the pH electrode and the reference electrode.
The pH meter is manufactured by comparing various pH readings of the sample solutions to the defined solution with a defined reference pH, such as buffers. Therefore is important to calibrate the pH meter with appropriate buffer values before measuring any pH.
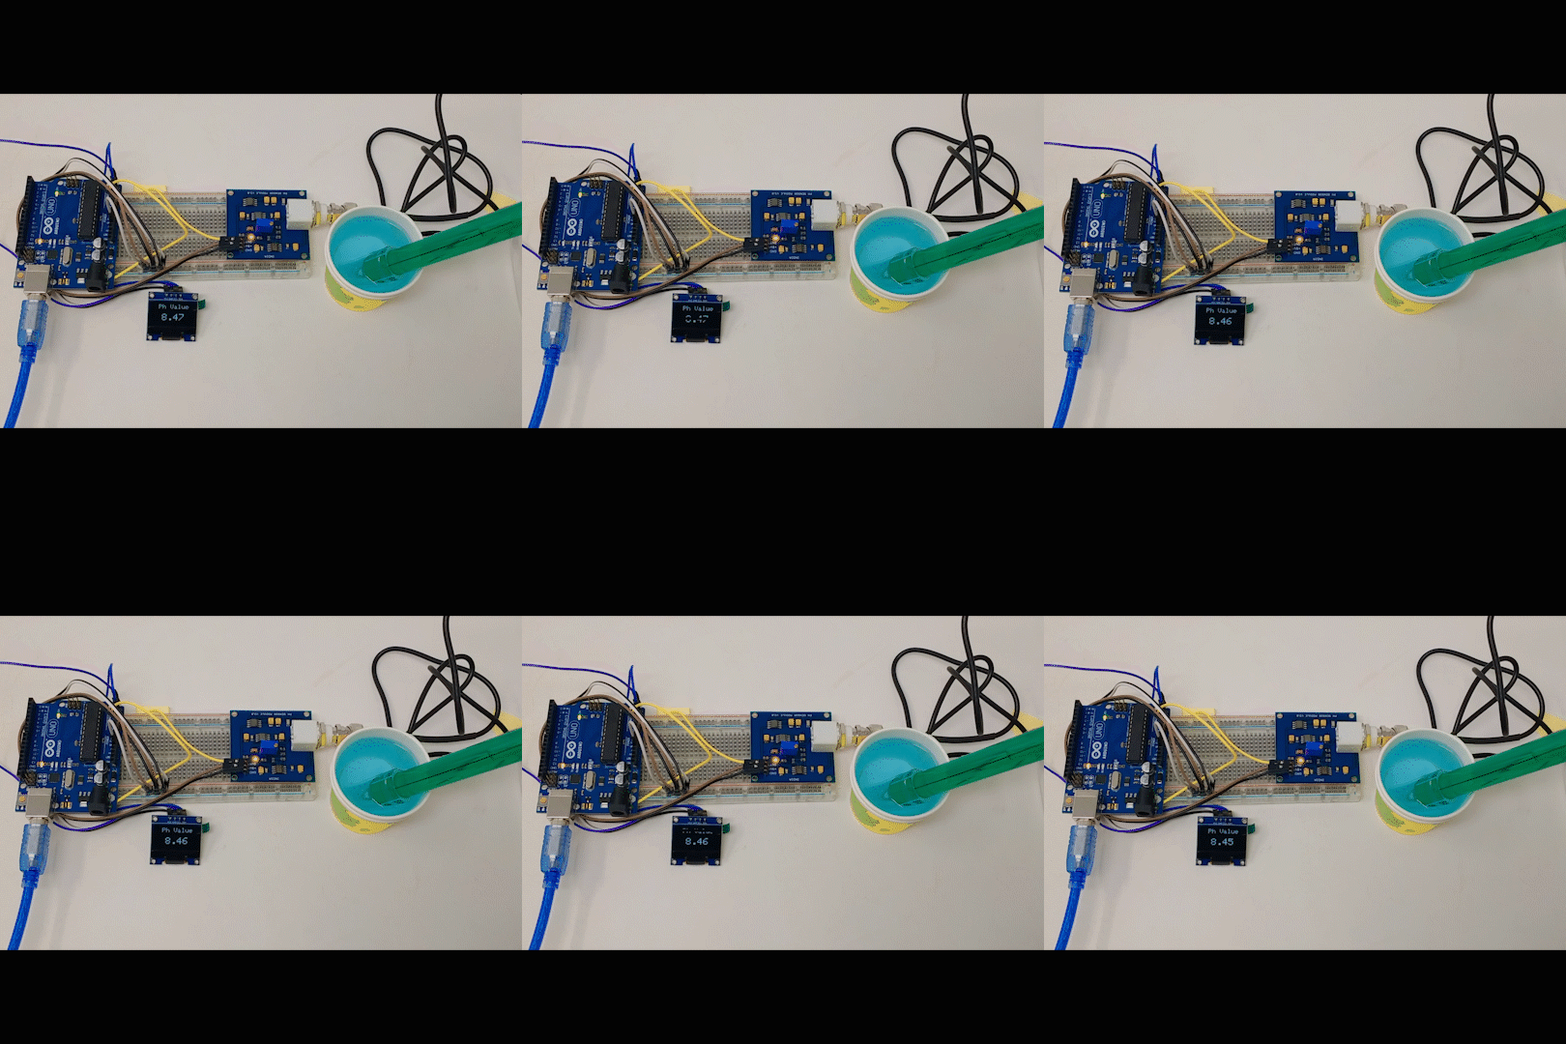
In this article, we will interface various types of pH sensors with Arduino, and we will analyze the data we are going to get by the pH sensor. So we will come to know which is the best sensor to measure pH. Then let's get started.
What is PH?
A simple definition of pH is a quantitative measure of the acidity or basicity of aqueous or other liquid solutions. It is an important quantity that reflects the chemical condition of the solution. It can control the availability of nutrients, biological functions, microbial activity, and the behaviour of chemicals.
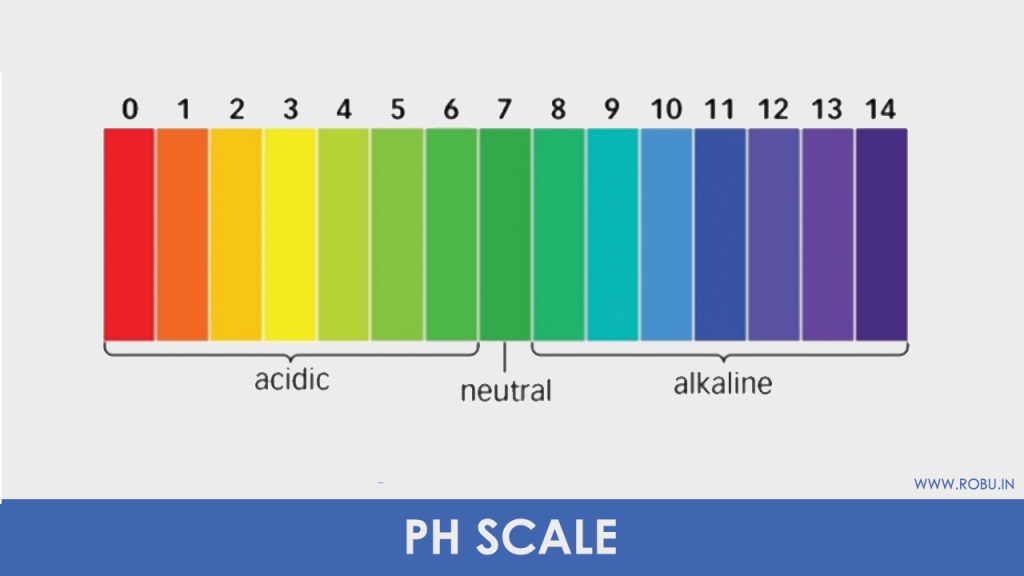
A solution with a pH of less than seven is considered acidic. A solution with a pH greater than seven is considered basic or alkaline. A solution that has a pH equal to seven is a neutral liquid. Thus, pH is a measure of how acidic or basic a liquid is, ranging from 0 to 14.
The numbers and colours represent the pH. Each number represents the ten times change in the acidity or the basicness of the solution. The measurement is done as per the number of hydroxyl or hydrogen atoms present in the solution.
- If a liquid has more free hydrogen ions = Acidic
- If a liquid has more free hydroxyl ions = Base
Importance of PH Meter
Most products require a specific pH for activity and stability purposes. It has a large importance in the food industry, cosmetic industries as well as in pharmaceutical industries. Thus there is a huge industrial application of pH from water conditioning to food processing.
In the Electrochemical industry, pH measurement is the central process of planting, metal surface etching, and battery assembly. The paper and textiles industry requires accurate pH measurements to ensure the wastewater produced in plants does not damage equipment and the environment.
Required Components
Analysis of Different PH Sensors
Grove – PH Sensor Kit
The sensor is the low cost pH sensor. We can easily interface this sensor with Arduino as well as the raspberry pi. It is comparatively low cost and gives us good results. Also, it is easy to interface. The sensor will give us the digital values as output.
Let's have a look at the technical Specifications of this module.
- Its operating voltage is 3.3V/5V.
- The operating range is 0-14PH.
- The resolution it can provide is ±0.15PH(STP ).
- Its response time is less than 1 Minute.
- The operating temperature range is 0-60℃.
- Internal resistance is ≤250MΩ(25℃).
Gravity Analog PH sensor
This sensor is specially made for an Arduino controller. We can directly interface it with the Arduino, but we cannot use it with raspberry pi. It is available at affordable prices. It is easy to use and less complicated. The sensor is the analog sensor and hence gives us the analog values in the output.
Let's have a look at its technical specifications:
- Its operating voltage is 3.3V/5V.
- The operating range is 0-14pH.
- The resolution it can provide is ±0.15pH(STP ).
- Its response time is less than 1 Minute.
- The operating temperature range is 0-60℃.
- Internal resistance is ≤250MΩ(25℃).
Interfacing of Gravity Analog PH Sensor with Arduino
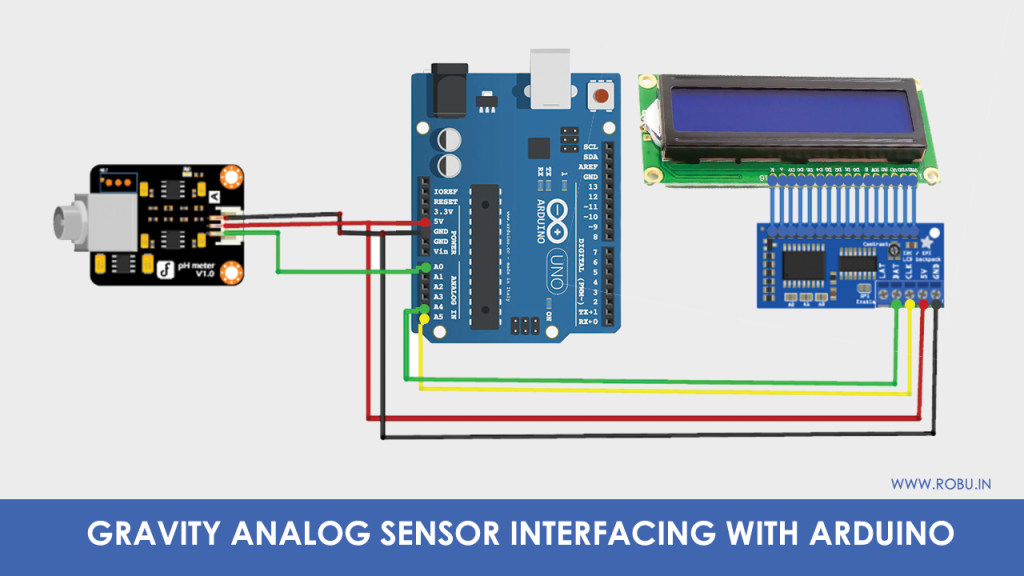
The process of interfacing for both of the sensors will be the same. All you have to do is connect the sensor properly, as shown in the Circuit diagram, and calibrate it properly.
Hook this PH sensor as per the circuit diagram shown above.
- Connect the VCC of the sensor to the 5V of the Arduino.
- Connect the GND of the sensor to the GND of the Arduino
- Connect the signal pin of the sensor to the A0 of the Arduino.
- Interface the I2C module with a display properly.
- Connect 5V and GND of the display to the 5V and GND of the Arduino.
- Connect CLK of the display to the A5 pin of Arduino.
- Connect the DAT pin to the A4 pin of the Arduino.
Code & Software
Once all the connections are done properly install Arduino software in your system and upload the following sketch in it.
#include <Wire.h>
#include <LiquidCrystal_I2C.h>
LiquidCrystal_I2C lcd(0x27, 16, 2);
float calibration_value = 21.34;
int phval = 0;
unsigned long int avgval;
int buffer_arr[10],temp;
void setup()
{
 Serial.begin(9600);
  lcd.init();
  lcd.begin(16, 2);
  lcd.backlight();
  lcd.setCursor(0, 0);
  lcd.print("   Welcome to      ");
  lcd.setCursor(0, 1);
  lcd.print(" Circuit Digest    ");
  delay(2000);
  lcd.clear();
}
void loop() {
 for(int i=0;i<10;i++)
 {
 buffer_arr[i]=analogRead(A0);
 delay(30);
 }
 for(int i=0;i<9;i++)
 {
 for(int j=i+1;j<10;j++)
 {
 if(buffer_arr[i]>buffer_arr[j])
 {
 temp=buffer_arr[i];
 buffer_arr[i]=buffer_arr[j];
 buffer_arr[j]=temp;
 }
 }
 }
 avgval=0;
 for(int i=2;i<8;i++)
 avgval+=buffer_arr[i];
 float volt=(float)avgval*5.0/1024/6;
 float ph_act = -5.70 * volt + calibration_value;
 lcd.setCursor(0, 0);
 lcd.print("pH Val:");
 lcd.setCursor(8, 0);
 lcd.print(ph_act);
 delay(1000);
}
Final Words
Thanks for reading this article till the end. Hope all the concepts about pH and pH sensor got clarified through this article. If you like this article, please let us know in the comment section.


