IoT based Temperature and Humidity Monitoring using BLYNK Application
Hi guys, today we will going to make one amazing and very simple IOT project with the help of ESP8266 NodeMCU by which you can monitor the data of a

Hi guys, today we will going to make one amazing and very simple IOT project with the help of ESP8266 NodeMCU by which you can monitor the data of a place on your mobile screen from any point of the world.
So what we will going to learn in this project ?
- what is Blynk app?
- A short introduction on a DHT-11 sensor and NodeMCU
- How to create a new project in a Blynk app?
- How to build this project?
- Scope of this project
Before, going to build this project, we will first see the short introduction to the main elements of this tutorial, which are the NodeMCU, DHT sensor, and blynk app.
What is NodeMCU?
The ESP8266 Integrates 802.11b/g/n HT40 a Wi-Fi transceiver, so it cannot only connect with a Wi-Fi network and interact with the Internet. It can also set up a network of its own, allowing other devices to connect directly to it. There’s an on-board voltage regulator that ensures the cleanest possible power to the NodeMCU itself, as well as a push-button reset and a USB connection for easy interface with your computer.
For more information regarding the NodeMCU, you can check my previous blog from here, you will get complete information regarding this tiny little board. Also, the board installation part I have mentioned in my other block, you can check out the blog through this link.
Before moving forward in this blog make sure that you should have these two blogs carefully because these blogs are basic but the most important key element of this whole process.
What is a DHT Sensor?
DHT11 is a low-cost digital sensor for sensing temperature and humidity. This sensor can easily interfaced with any microcontroller such as Arduino, Raspberry Pi, etc… to measure humidity and temperature instantaneously. DHT11 humidity and temperature sensor are available as a sensor and as a module. The difference between this sensor and module is the pull-up resistor and a power-on LED. DHT11 is a relative humidity sensor.
How it works?
The working of the DHT sensor is pretty simple. DHT11 sensor consists of a capacitive humidity sensing element and a thermistor for sensing temperature. The humidity sensing capacitor has two electrodes with a moisture-holding substrate as a dielectric between them. Change in the capacitance value occurs with the change in humidity levels. The IC measure, process this changed resistance values and change them into digital form.
For measuring temperature this sensor uses a Negative Temperature coefficient thermistor, which causes a decrease in its resistance value with an increase in temperature. To get a larger resistance value even for the smallest change in temperature, this sensor is usually made up of semiconductor ceramics or polymers.
[caption id="attachment_642819" align="aligncenter" width="293"]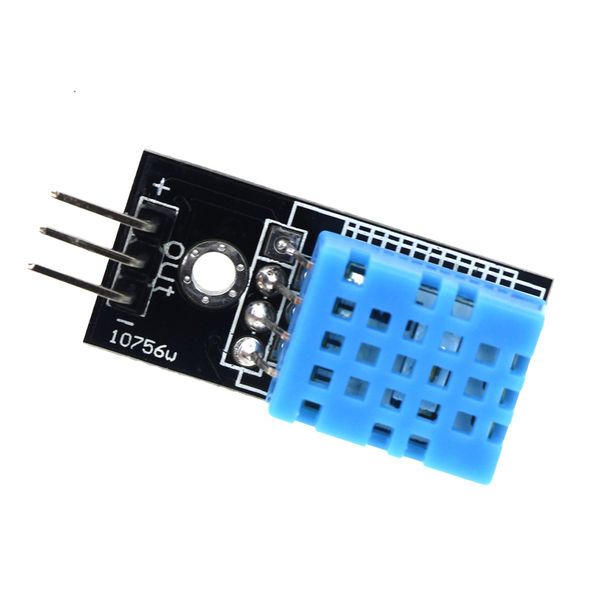 DHT11 Sensor[/caption]
The temperature range of DHT11 is from 0 to 50 degrees Celsius with a 2-degree accuracy. The humidity range of this sensor is from 20 to 80% with 5% accuracy. The sampling rate of this sensor is 1Hz .i.e. it gives one reading for every second. DHT11 is small in size with an operating voltage from 3 to 5 volts. The maximum current used while measuring is 2.5mA.
Pinout of DHT sensor:
[caption id="attachment_797646" align="aligncenter" width="342"] DHT-11-PINOUTS[/caption]
What is Blynk App And How it works?
Blynk was designed for the Internet of Things. It can control hardware remotely, it can display sensor data, it can store data, visualize it, and do many other cool things. Every time you press a Button in the Blynk app, the message travels to the Blynk Cloud, where it magically finds its way to your hardware. It works the same in the opposite direction and everything happens in a blynk of an eye.
There are three major components in the platform:
-
Blynk App - allows to you create amazing interfaces for your projects using various widgets we provide.
-
Blynk Server - responsible for all the communications between the smartphone and hardware. You can use our Blynk Cloud or run your private Blynk server locally. It’s open-source, could easily handle thousands of devices and can even be launched on a Raspberry Pi.
-
Blynk Libraries - for all the popular hardware platforms - enable communication with the server and process all the incoming and outcoming commands.
ok, now move towards action, first of all we will gonna see what hardware parts we will need, as in todays date we all have smartphone in our hand, so I m not gonna mention that you will need a samartphone and blynk app installed in it. basically we will need a
- Breadboard
- NodeMCU,
- DHT 11 sensor
- 5v power supply (you can also use your mobile charger)
- few jumper cables(male-male, male-female, female-female)
- micro USB (B- type) programming cable
In a software part we will need
- Arduino IDE
- Blynk Appilication
Application Installation and Configuration:
For installation of the blynk app, you need to follow these steps
Go to play store app store and type blynk, you will find the green color icon for the blynk app, then install it on your device.
 Blynk App[/caption]
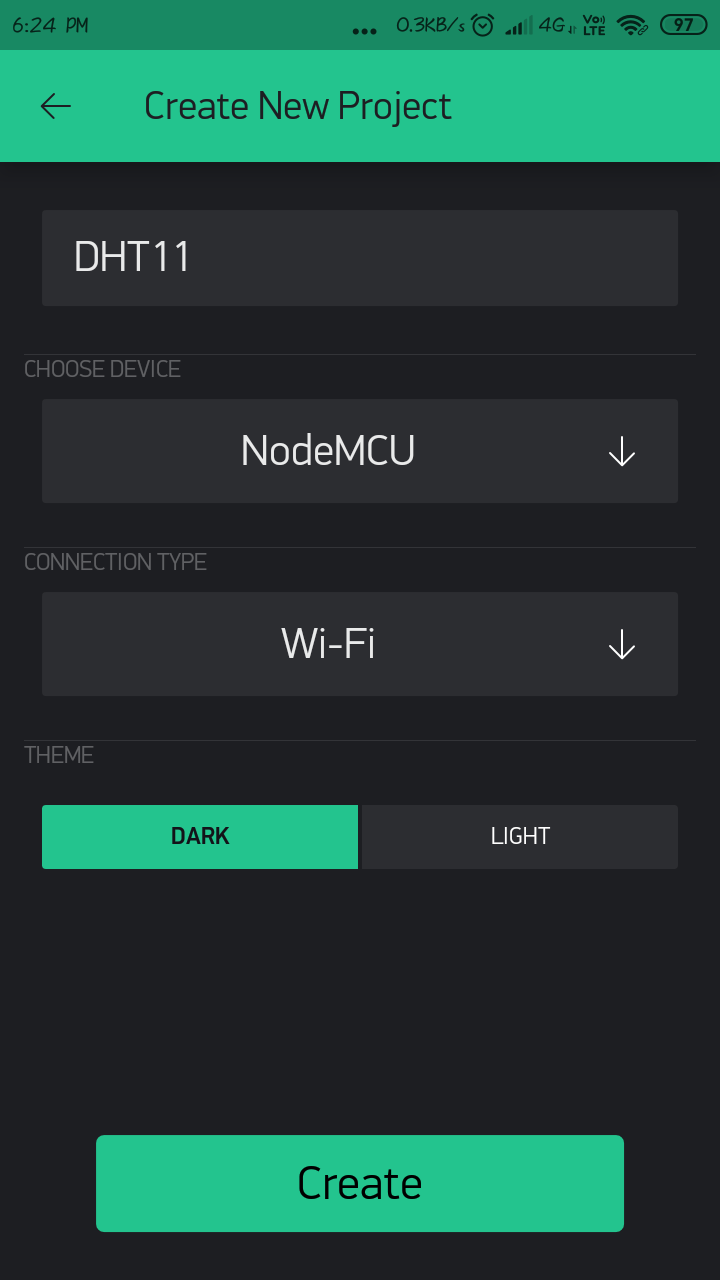
- Sign up with a gmailid and then create a new project.
- then click on create option and fill the details like project name, device used and connection type.
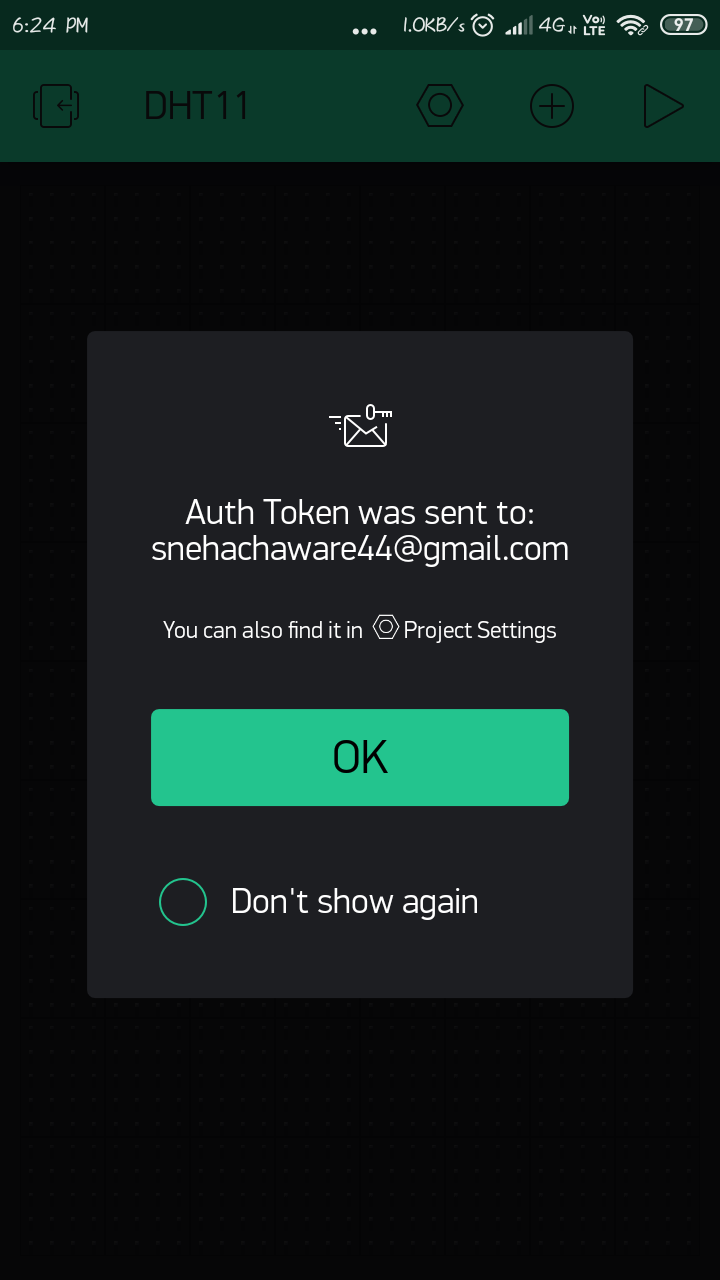
- Auth token will be generated this auth token you will get in the settings option of this project and on your Gmail Account.
- Once your project is created, you have to insert different types of widget into it, For example I will be adding two buttons from widget box shown below.
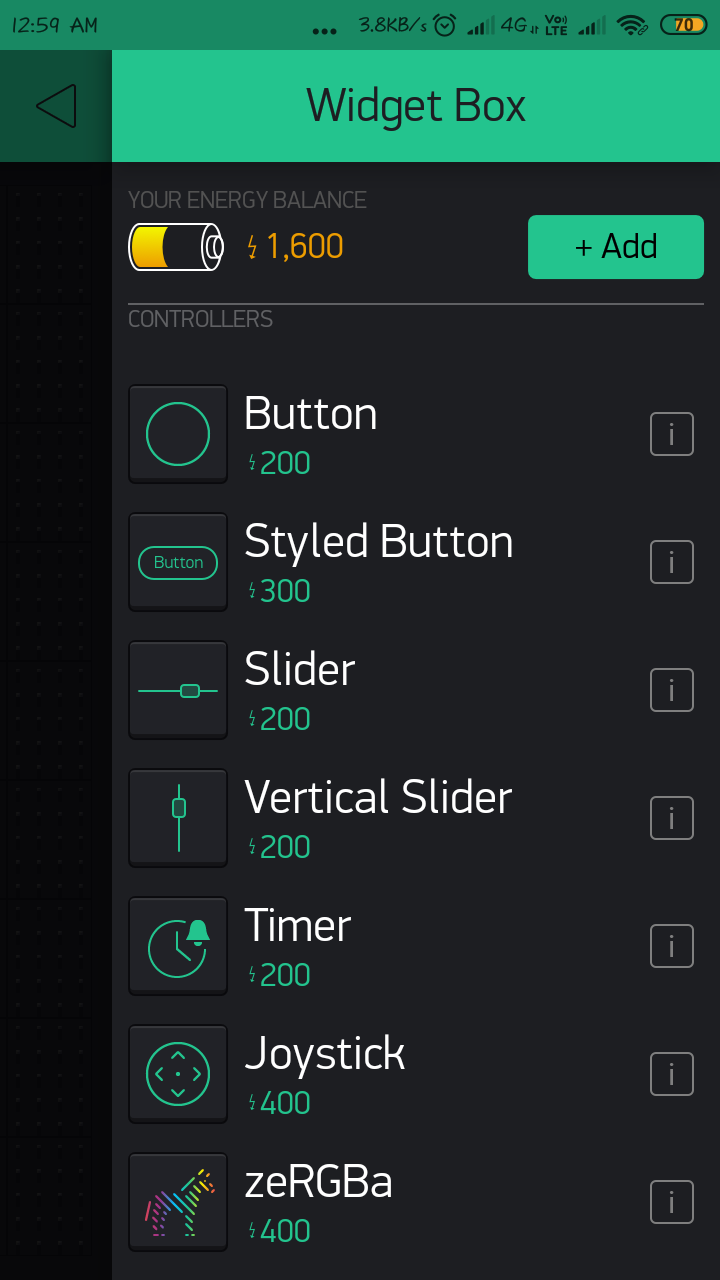 widgetBox[/caption]
- After selecting two Gauge click on the Settings Gauge and fill the details like i did in following image.
- The guage I selected if for showing temperature and humidity
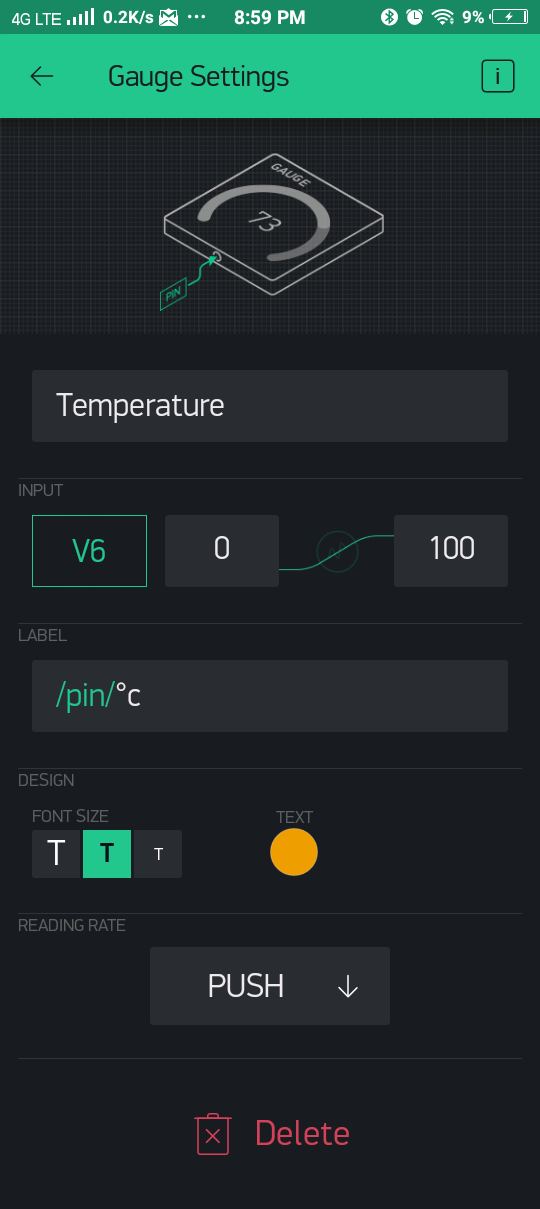 TemperatureGauge[/caption]
[caption id="attachment_799080" align="aligncenter" width="285"]
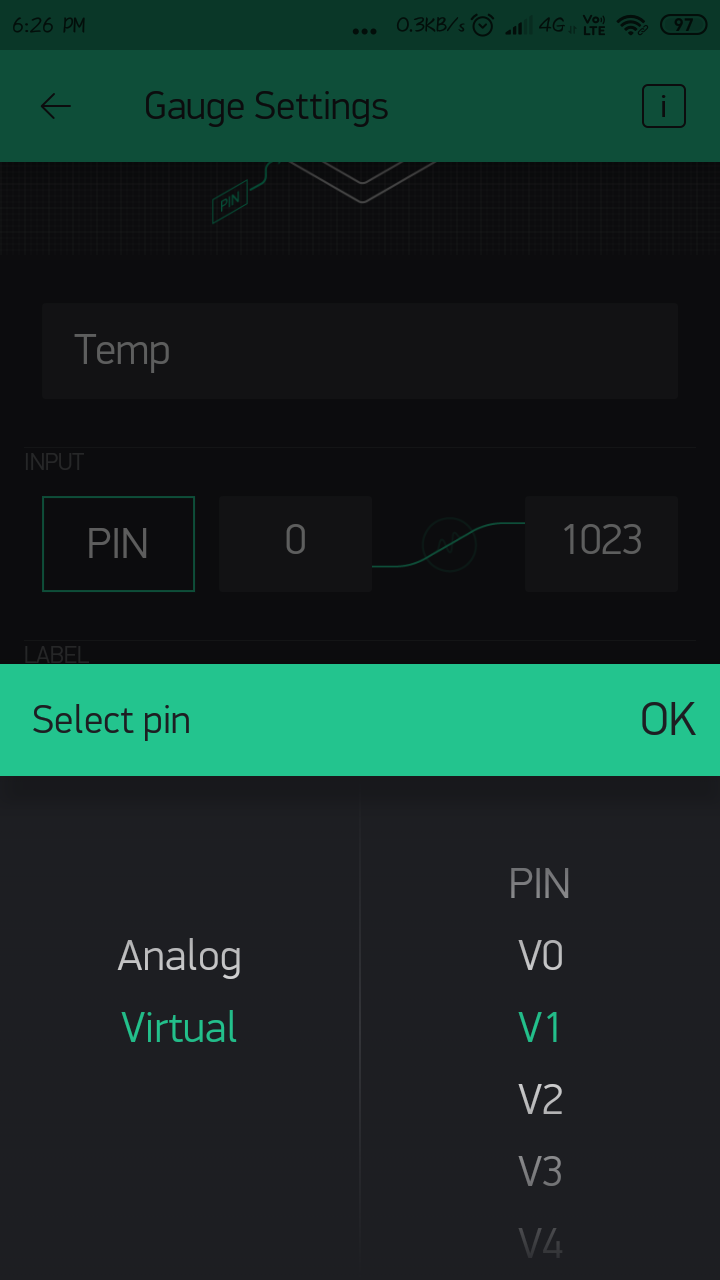 GaugeSetting[/caption]
[caption id="attachment_876712" align="aligncenter" width="285"]
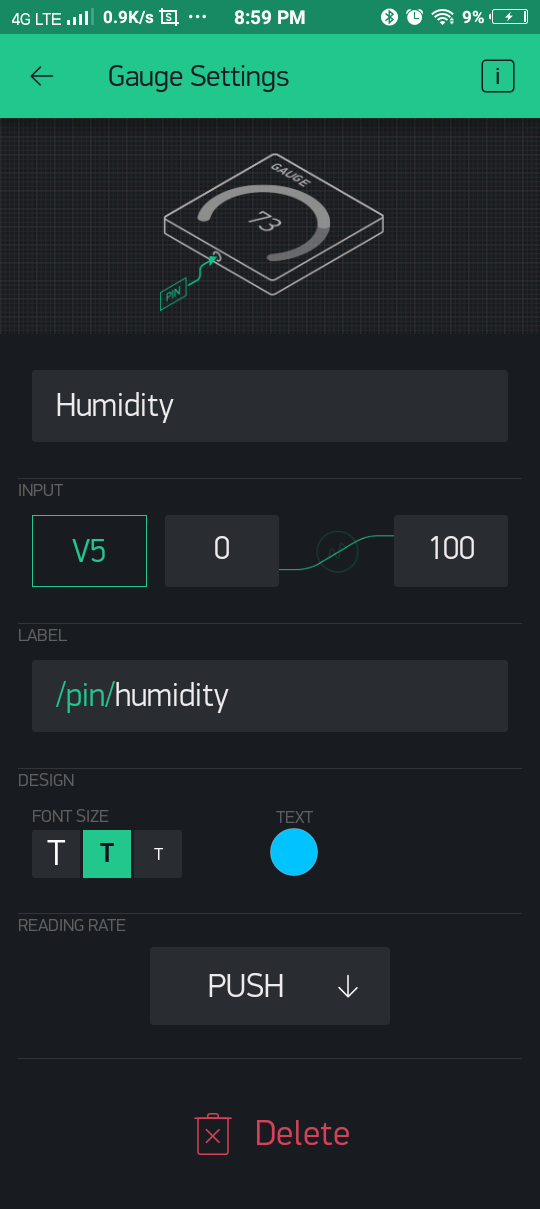 Humidity Gauge[/caption]
- For Displaying all the data serially we use serial terminal
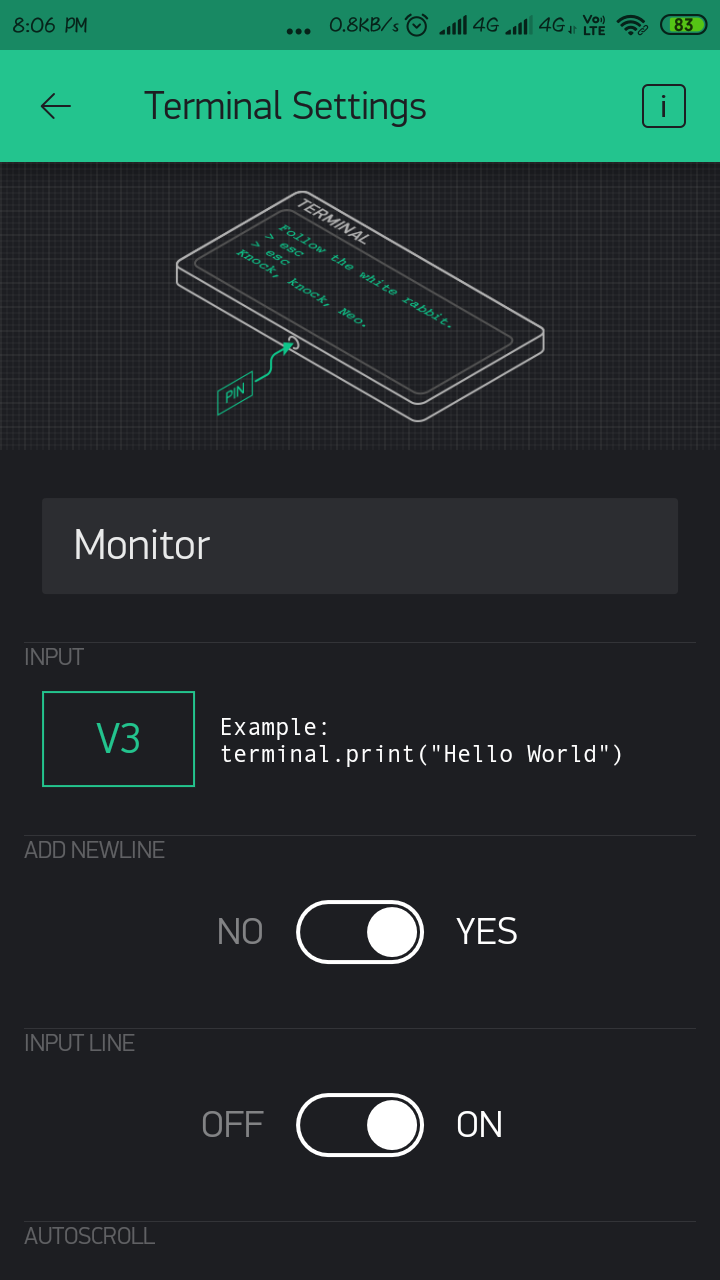 SerialDisplay[/caption]
[caption id="attachment_799086" align="aligncenter" width="291"]
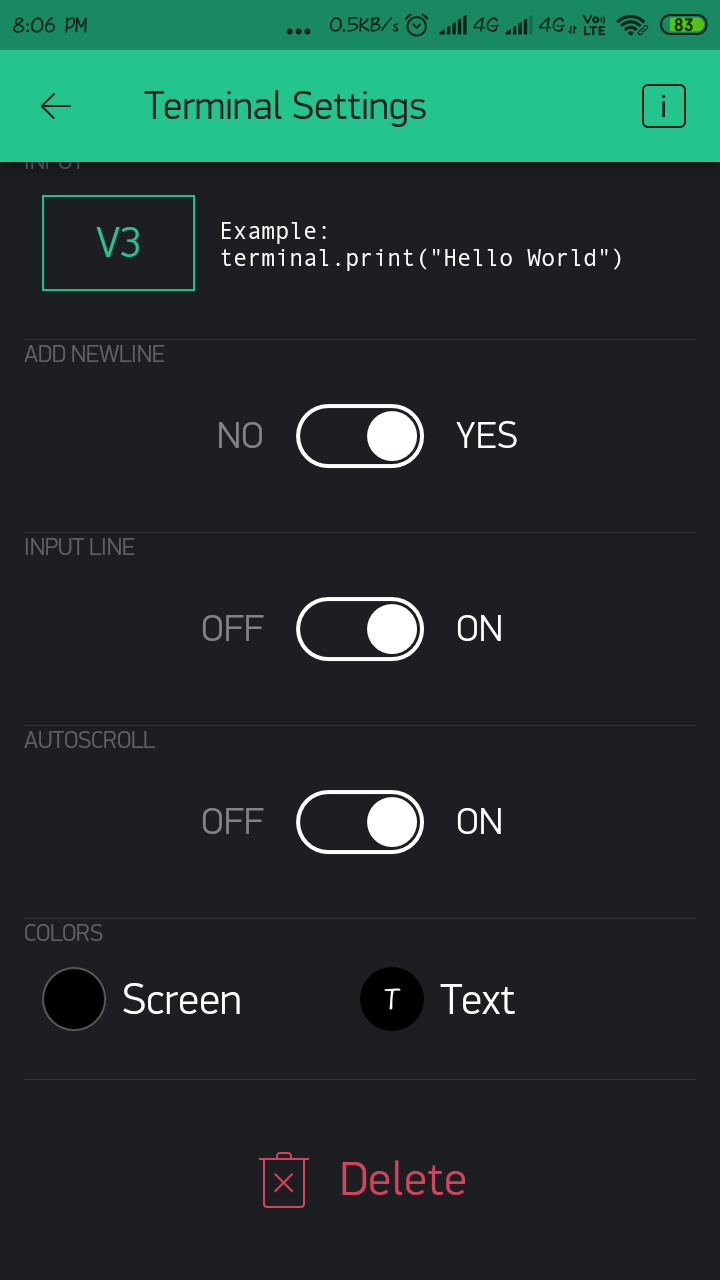 SerialDisplay2[/caption]
- After all the process with this settings your Dashboard will look appear like this.
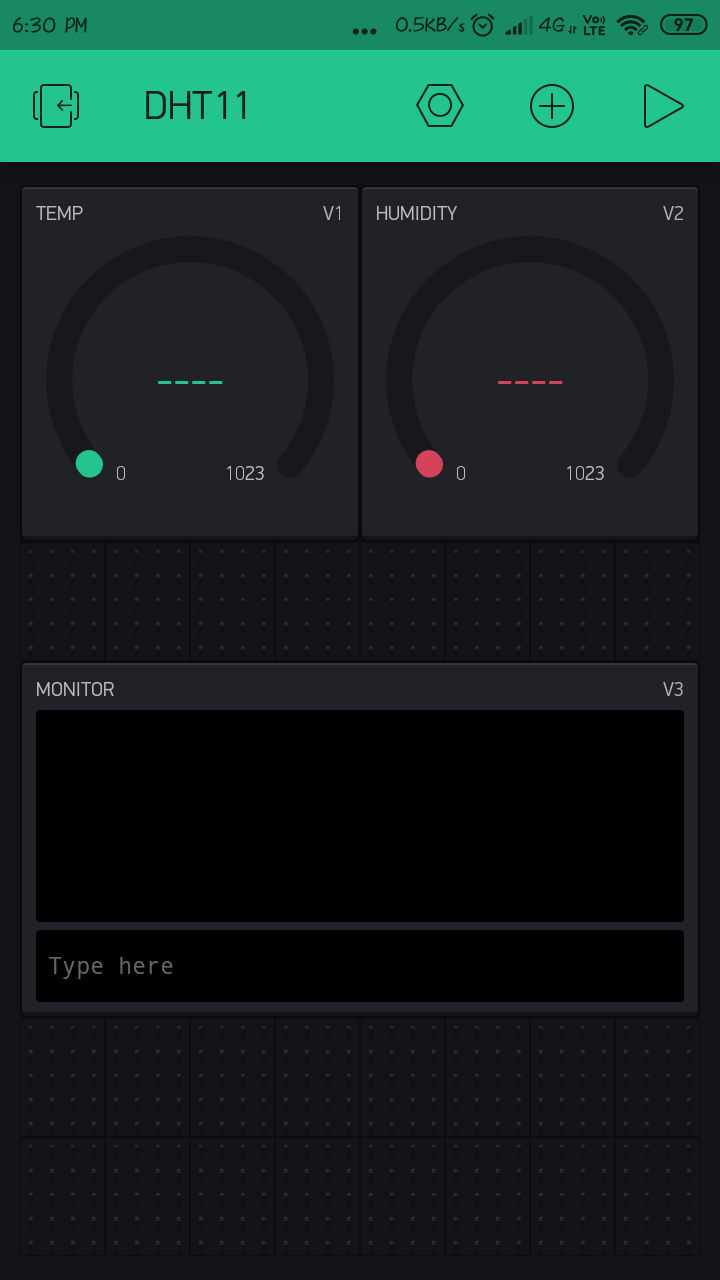 Dashboard[/caption]
[caption id="attachment_799095" align="aligncenter" width="299"]
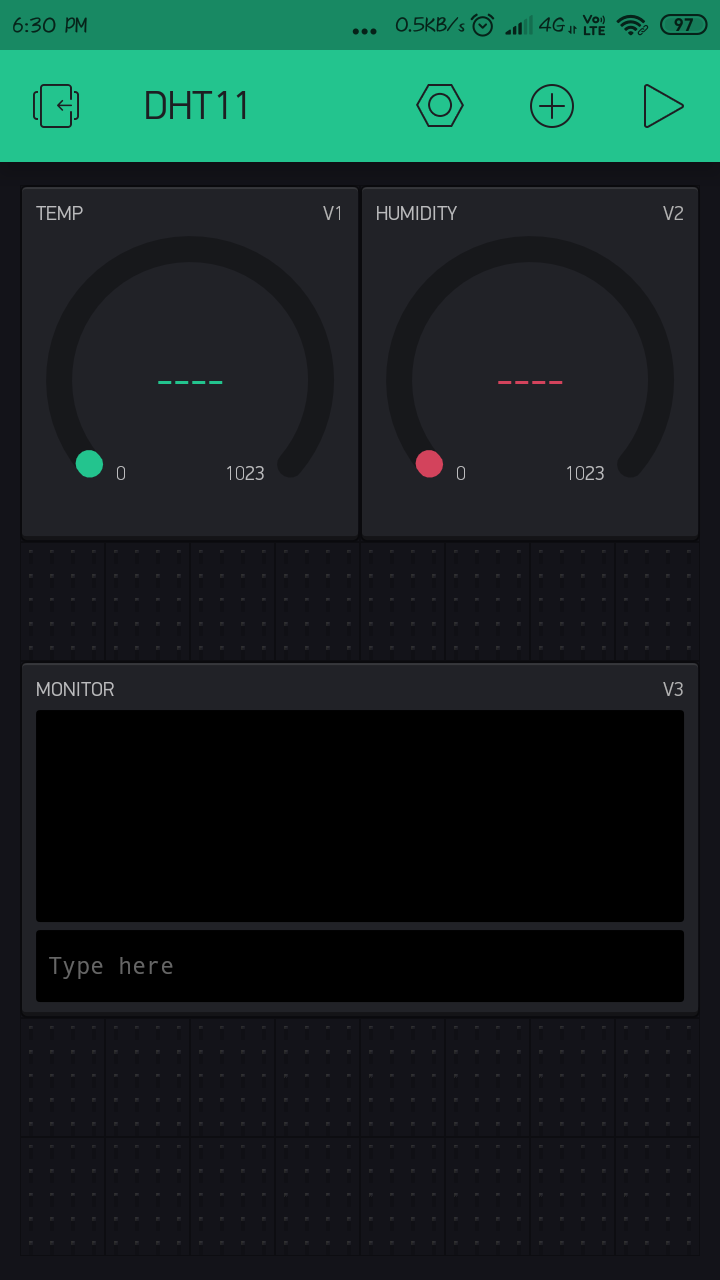 Dashboard[/caption]
[caption id="attachment_799112" align="aligncenter" width="296"]
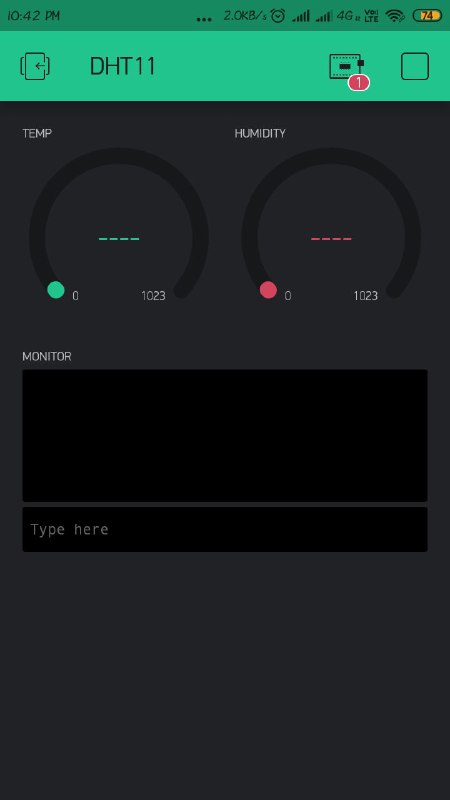 Dashboard[/caption]
- The board icon shown in brown circle has One Red Notification like symbol on it, because the app is not connected with board for that you have to follow some steps.
- First, you have to open your blynk registered Gmail acc open the mail from blynk app which gives you AUTH token for your project"DHT11", copy that auth code to Auth type in the code box.
- Insert your Hotspot ID password into your SSID and Password on your Arduino Sketch.
This is the complete process of installtion of BLYNK application and setting up the DHT project, Now we will move towards coding part
Coding Part
Now I m gonna tell you all the installtion and coding part, So go with the following procedure step by Step:
- Open the Arduino IDE
- Install the NodeMCU board, installtion steps of this board given in my previous blog
- After following above blog, you need to install blynk library from Github, you can also visit the library from the following links: Blynk Library, DHT sensor library.
- We have installed DHT11 library in arduino , whereas we have added a widget "Terminal" for displaying a data on teaminal of blynk application. Data will be automatically update after a small time interval.
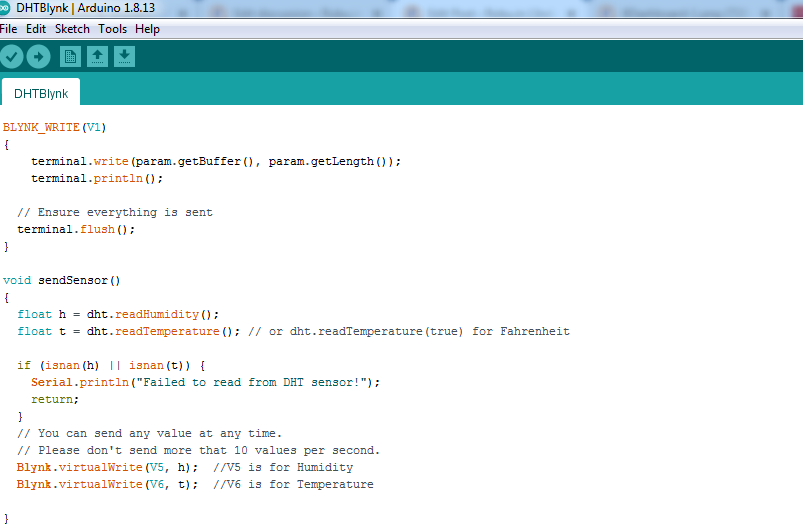 SendSensor[/caption]
- We have added Sendsensor function to send the data from DHT11 Sensor to Blynk created widget, in this function "Blynk.virtualWrite(V5, h)", is used for sending humidity data on widget of Blynk app which is created on virtual terminal V5.
- Here I have attached the final code
#define BLYNK_PRINT Serial    // Comment this out to disable prints and save space
#include <SPI.h>
#include <ESP8266WiFi.h>
#include <BlynkSimpleEsp8266.h>
#include <SimpleTimer.h>
#include <DHT.h>


char auth[] = "TB6KiXEXl----------qFo3Bp"; //you can add yout auth token
char ssid[] = "sneha123";     // your Wifi name
char pass[] = "asdfghjkl";    // your wifi password


#define DHTPIN D1          // Digital pin D1
float  moisture;
#define DHTTYPE DHT11     // DHT 11
int temp, Humid;
DHT dht(DHTPIN, DHTTYPE);
SimpleTimer timer;


WidgetTerminal terminal(V1);

BLYNK_WRITE(V1)
{
    terminal.write(param.getBuffer(), param.getLength());
    terminal.println();

  // Ensure everything is sent
  terminal.flush();
}

void sendSensor()
{
  float h = dht.readHumidity();
  float t = dht.readTemperature(); // or dht.readTemperature(true) for Fahrenheit

  if (isnan(h) || isnan(t)) {
    Serial.println("Failed to read from DHT sensor!");
    return;
  }
  // You can send any value at any time.
  // Please don't send more that 10 values per second.
  Blynk.virtualWrite(V5, h);  //V5 is for Humidity
  Blynk.virtualWrite(V6, t);  //V6 is for Temperature

}

void setup()
{
  Serial.begin(9600); // See the connection status in Serial Monitor
  Blynk.begin(auth, ssid, pass);

  dht.begin();
  timer.setInterval(1000L, sendSensor);
  terminal.flush();
}

void loop()
{


  temp = dht.readTemperature(); // or dht.readTemperature(true) for Fahrenheit
  Humid = dht.readHumidity();

  Serial.print("temp: ");
  Serial.print(temp);
  Serial.print(" c");
  terminal.print("temp: ");
  terminal.print(temp);
  terminal.print(" c");
  Serial.print("    Humidity: ");
  Serial.print(Humid);
  Serial.println(" %");
  terminal.print("  Humidity: ");
  terminal.print(Humid);
  terminal.println(" %");
  delay(300);


   terminal.flush();

  Blynk.run(); // Initiates Blynk
  timer.run(); // Initiates SimpleTimer
}- after coding part you have to make some simple connection of NodeMCU with DHT like shown in the image
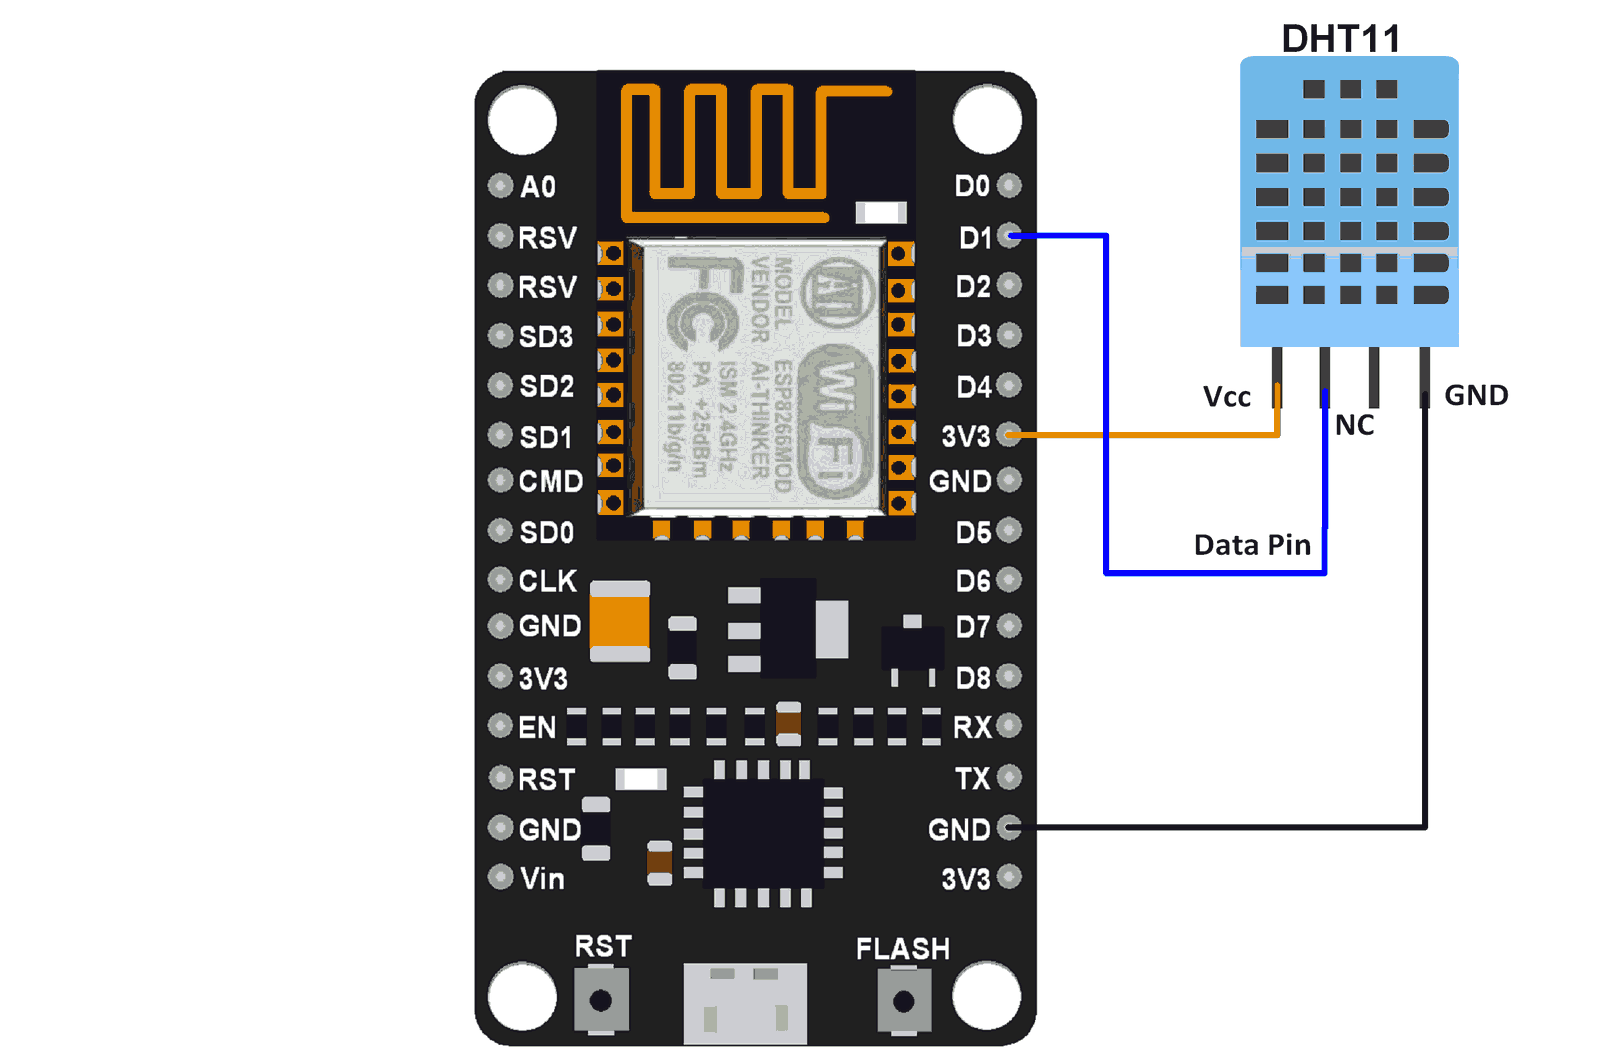 DHT11_Interfacing[/caption]
- In the main function we have added a line "terminal.print()" is for printing a data on a serial terminal, After getting all the data your dashboard will be look like this,
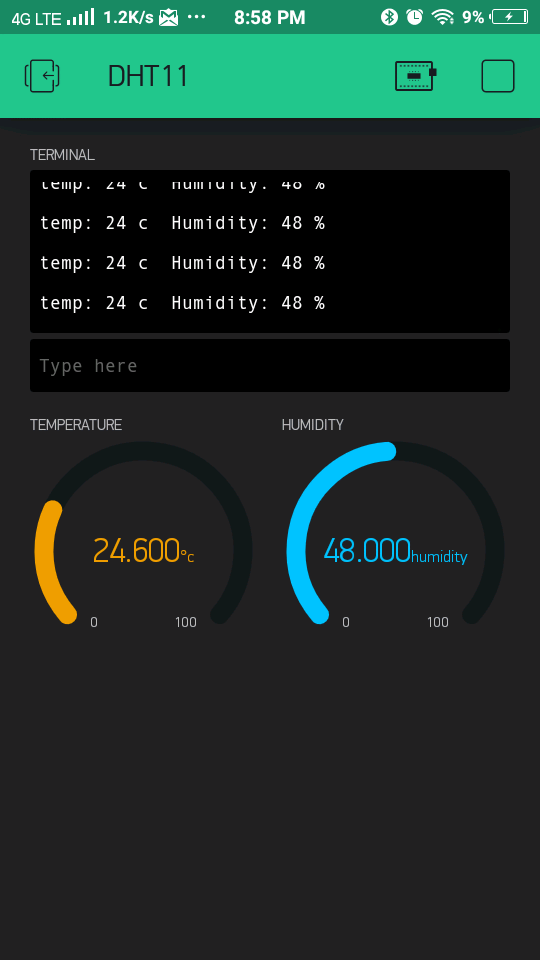 FinalDashboard[/caption]
So guys this is all about a simple IOT based blynk project. if you like this project you can also try to make it, it's very easy. If you find any difficulty please mention your query in comment section.


