Detailed guide on What is Arduino?
As you are here, I assume you are new to the world of Arduino. Welcome! to the most popular topic of the electronics field. In this guide, I will be

As you are here, I assume you are new to the world of Arduino. Welcome! to the most popular topic of the electronics field. In this guide, I will be explaining to you what is Arduino? and how it makes a difference in the world.
By reading this blog you will learn
- Introduction to Basics of Arduino Boards
- Hardware Part
- Software Part
- Where is Arduino Used?
- Arduino Architecture
- Arduino Pin Configuration
- Types of Arduino
- Applications of Arduino as a Microcontroller
Introduction to Basics of Arduino
The reason you are here and reading this article or basically your excitement to learn the Arduino is because this is an open source platform.
SIDENOTE: Let me explain you in brief, the term Open Source indicates that all the resources for the board are free and open to all. This means anyone can modify it according to their need.
Arduino is an open-source electronics prototyping platform based on flexible, easy-to-use hardware and software. It's intended for artists, designers, hobbyists, and anyone interested in creating interactive objects or environments.
Arduino can sense the environment by receiving input from a variety of sensors and can affect its surroundings by controlling lights, motors, and other actuators. The microcontroller on the board is programmed using the Arduino programming language (based on Wiring) and the Arduino development environment (based on Processing). Arduino projects can be stand-alone or they can communicate with software on running on a computer (e.g. Flash, Processing, MaxMSP).
Depending upon the above fact, the fun part that I want you to know, the Arduino is designed, developed and made popular by the community of makers who constantly share their electronics project ideas with the world. The work that they did, does or will do is publicaly available or "Open-Source" meaning you can copy their project connections, codes, component to complete the project and sometimes or many-times everybody shares how exactly Step-by-Step they are doing things with Arduino. Cool!
If you want to explore some of the best Arduino projects then click here on this Instructable Link.
Arduino is designed to make electronics more accessible to engineers, DIY people, artists, designers, hobbyists, and anyone interested in creating interactive objects or environments.
Arduino is most popular amongst student in the engineering colleges and the beginner who want to start from the basics of electronics, programming, and coding. The students can work at their own pace, have fun with all the real-world projects, and increase their confidence as they go.
In my opinion if you want to be a Embedded Coder then the Arduino is no more than a great to start with, because programing with Arduino is extremely easy. It offers very simplified version of the C++ which you can practice and learn within some weeks. Trust Me!
The definition and working of arduino board is something as explained on the official website is,
Arduino is an open-source electronics platform based on easy-to-use hardware and software. Arduino boards are able to read inputs - light on a sensor, a finger on a button, or a Twitter message - and turn it into an output - activating a motor, turning on an LED, publishing something online. You can tell your board what to do by sending a set of instructions to the microcontroller on the board. To do so you use the Arduino programming language (based on Wiring), and the Arduino Software (IDE), based on Processing.
Most Arduino boards consist of an Atmel 8-bit AVR microcontroller (ATmega8, ATmega168, ATmega328, ATmega1280, or ATmega2560) with varying amounts of flash memory, pins, and features.
This compact size and the easy-to-use microcontroller is the brain for many small electronics based projects to complex projects that will make you Electronics Superhero. So, let's continue and know more about this Arduino. First, the hardware!!!
Arduino Hardware Part
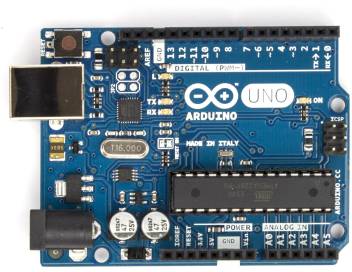
Most articles only explain the software of Arduinos: what's on the virtual software, what each function does, etc. However, understanding the hardware design makes you forward in the knowledge of Arduino. The Arduino consists of a simple baseboard. This baseboard has a microcontroller and its support circuitry along with connectors to connect to plug-in modules and a USB interface to download code from the PC. Eg. Arduino Uno.

The Arduino Uno can be powered via the USB connection or with an external power supply. The power source is selected automatically by the board, you don’t need to worry about it.
The external (non-USB) power can come either from an AC-to-DC adapter or battery. You should connect the adapter by plugging a 2.1mm center-positive plug into the board's power jack. Also, You can insert leads from a battery in the GND and Vin pin headers of the POWER connector.
The board can operate on an external supply of 6 to 20 volts but, there’s a safety precaution for the board. If you supply less than 7V, the 5V pin may supply less than five volts and the board may be unstable. So, it’s better to go for greater than 7V but less than 12V. Because, If you use more than 12V external supply to the board, the voltage regulator may overheat and damage the board. That’s why the recommended range is 7 to 12 volts.
The power pins are as follows:
• Vin – It is the input voltage to the Arduino board when it's using an external power source (as
opposed to 5 volts from the USB connection or other regulated power source). You can
supply voltage through this pin or access it through this pin if you are supplying voltage via the power jack.
• 5V - It is the regulated power supply pin used to power the microcontroller and other components on the board. This can come either from VIN via an on-board regulator, or be supplied by USB or another regulated 5V supply.
• 3V3 – It is a 3.3 volt supply generated by the on-board regulator. Its maximum current draw is 50 mA.
• GND - Ground pins.
How to Identify Original & Duplicate Arduinos?
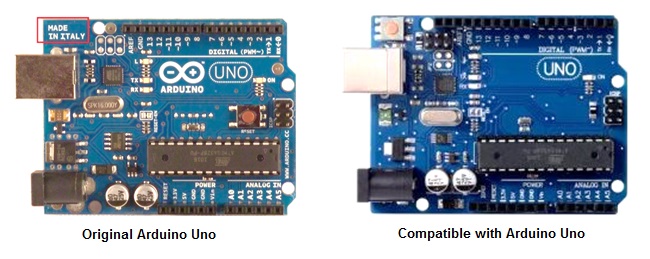
As Arduino is open-source hardware and software, anyone can download the design file of Arduino from their website and can make their own boards exactly similar without infringing their rights, due to this there are a number of variants of Arduino UNO boards available in the market. But, How to differentiate them from the original ones.
- First of all, the Arduino name is the copyright of the company. Any other variant board manufacturer apart from Arduino’s company can’t use the label ‘Arduino’ on board. They are supposed to name the product as ‘compatible with Arduino’. However, you won’t see ‘Made in Italy’ on it.

There is no difference in working of both compatible and original UNO. Also, there are few check-points to check between counterfeit variants!
- Check for the hologram first. It will have a hologram over the box stating originality of the product if you’ve bought for product name –original Arduino. If not, take a careful look at the packaging. If it is way too mainstream, it is undoubtedly pirated version of the product.
- Download the original software of Arduino. This is another check point. Once you interface a pirated hardware with the original software, it will either not response or will start misbehaving.
- What if it still connects & responds to the software? Still don’t worry, download official user manual from the site. It contains various programs for initiation on the board, try to burn the code & check if the program burns into the board? If program runs, your board is Okay!
Arduino Software Part
Arduino Integrated Development Environment (IDE) is open-source software that is mainly used for writing and compiling the code into the Arduino Module. It is actually a cross-platform application (for Windows, macOS, Linux) that is written in functions from C and C++.

The IDE is simple and easy to learn software for writing Arduino codes. Arduino has huge flexibility with which you can make almost anything you imagine. This software can be easily connected to a variety of modules like fire sensors, obstacle sensors, presence detectors, GPS modules, GSM Modules, or anything with which you wish to give wings to your dream project.
You can download the Arduino IDE software from its official website.
Note: This section deals with the IDE on Windows. Other operating systems may differ!
Once the installer has downloaded, just go ahead and install the IDE. The Arduino IDE is incredibly minimalistic, yet it provides a near-complete environment for most Arduino-based projects.

The top menu bar has the standard options, including:
- File (new, load save, etc.),
- Edit (font, copy, paste, etc.),
- Sketch (for compiling and programming),
- Tools (useful options for testing projects),
- Help.
The middle section of the IDE is a simple text editor that where you can enter the program code. The bottom section of the IDE is dedicated to an output window that is used to see the status of the compilation like how much memory has been used, any errors that were found in the program, and various other useful messages.
Most projects will rely on the basic six buttons found below the menu bar.
![]()
- Check mark: is used to verify your code. Click this once you have written your code.
- Arrow: uploads your code to the Arduino to run.
- Dotted paper: will create a new file.
- Upward arrow: is used to open an existing Arduino project.
- Downward arrow: is used to save the current file.
- The far right button is a serial monitor. It is useful for sending data from the Arduino to the PC for debugging purposes.
Where is Arduino used?
Arduino has been used in thousands of different projects and applications. The Arduino software is easy to use for beginners, yet flexible enough for advanced users. It runs on Mac, Windows, and Linux. Teachers and students use it to build low-cost scientific instruments, to prove chemistry and physics principles, or to get started with programming and robotics.
There are many other microcontrollers and microcontroller platforms available for physical computing. But, the simplicity and easiness of Arduino have made it so popular that almost all makers use it. But, what's the secret behind this Arduino's popularity? Where does this simplicity & easiness come from? So, now is imperative to know architecture to understand how to make our nice Arduino board work exactly as we want it to!
Arduino Architecture
What is architecture in general terms? It is the complex or carefully designed structure of something. Here the architecture is of Arduino or precisely, of the IC of Arduino (ATmega328p). The processor of the Arduino board uses Harvard architecture where the program code and program data have separate memory. The Harvard architecture is a computer architecture with separate storage and signal pathways for instructions and data. It contrasts with the von Neumann architecture, where program instructions and data share the same memory and pathways.
The term Harvard is originated from the Harvard Mark I relay-based computer, which stored instructions on punched tape (24 bits wide) and data in electro-mechanical counters. These early machines had data storage entirely contained within the central processing unit, and provided no access to the instruction storage as data.
Harvard Architecture consists of two memories such as program memory and data memory. Wherein the data is stored in data memory and the code is stored in the flash program memory. The Atmega328 microcontroller has 32kb of flash memory, 2kb of SRAM 1kb of EPROM, and operates with a 16MHz clock speed. The following figure shows the architecture in detail.

Modern processors appear to the user to be von Neumann machines, with the program code stored in the same main memory as the data. For performance reasons, internally and largely invisible to the user, most designs have separate processor caches for the instructions and data, with separate pathways into the processor for each. This is one form of what is known as the modified Harvard architecture.
Arduino Pin Configuration

Starting clockwise from the top center:
- Analog Reference pin (orange): Reference voltage for the analog inputs.
- Digital Ground (light green): Used to provide Digital ground.
- Digital Pins 2-13 (green): Used for digital input/output. Digital Pins 0-1/Serial In/Out - TX/RX (dark green) - These pins cannot be used for digital i/o (digitalRead and digitalWrite)
- Reset Button - S1 (dark blue): Resets the microcontroller
- In-circuit Serial Programmer (blue-green)
- Analog In Pins 0-5 (light blue): Used to provide analog input in the range of 0-5V
- Power and Ground Pins (power: orange, grounds: light orange): Used to provide input power supply and ground to the microcontroller.
- External Power Supply In X1 (pink): Used to provide external power supply input to the microcontroller in the range of 9VDC-12VDC.
- Toggles External Power and USB Power (place jumper on two pins closest to desired supply) - SV1 (purple)
- USB: Used for uploading sketches to the board and for serial communication between the board and the computer, can be used to power the board (yellow)
If you want to learn more about the Pin Configuration of Arduino Boards the read the "What's on the Board" section of this blog by Sparkfun.
The 5 Major Benefits of Using Arduino:
- Inexpensive: Arduino boards are relatively inexpensive compared to other microcontroller platforms.
- Cross-platform: Most microcontroller systems are limited to Windows only. But the Arduino software runs on Windows, Macintosh OSX, and Linux operating systems.
- Simple, clear programming environment: The Arduino programming environment is easy to use for beginners, yet flexible enough for advanced users to take advantage of as well.
- Open source and extensible software: The Arduino software is published as open-source tools, available for extension by experienced programmers. The language can be expanded through C++ libraries. You can add AVR-C code directly into your Arduino programs if you want to.
- Open source and extensible hardware: The Arduino is based on Atmel's ATMEGA8 and ATMEGA168 microcontrollers. The plans for the modules are published under a Creative Commons license, so experienced circuit designers can make their own version of the module, extending it and improving it. Even relatively inexperienced users can build the breadboard version of the module in order to understand how it works and save money.
Types of Arduino
The list of Arduino boards includes the following such as:
Arduino Uno (R3)
Arduino Uno is the most standard board available and probably the best choice for a beginner. It is a good all-purpose board that has enough features for a beginner to get started with.

- Micro-controller : ATmega328.
- Operating Voltage: 5V.
- Input Voltage (recommended) : 7-12V.
- Digital I/O Pins: 14 (of which 6 provide PWM output).
- Analog Input Pins: 6.
Application:
- Arduino Uno is used in Do-it-Yourself projects prototyping.
- In developing projects based on code-based control
- Development of Automation System
- Designing of basic circuit designs.
Arduino Mega (R3)
The Arduino MEGA 2560 is designed for projects that require more I/O lines, more sketch memory, and more RAM.

- Microcontroller: ATmega2560
- Operating Voltage: 5V
- Input Voltage (recommended): 7-12V
- Input Voltage (limits): 6-20V
- Digital I/O Pins: 54 (of which 15 provide PWM output)
- Analog Input Pins: 16
Application:
- Developing 3D printer
- Controlling and handling more than one motors
- Interfacing of number of sensors
- Sensing and detecting temperature
- Water level detection projects
- Home automation and security systems
Arduino Nano
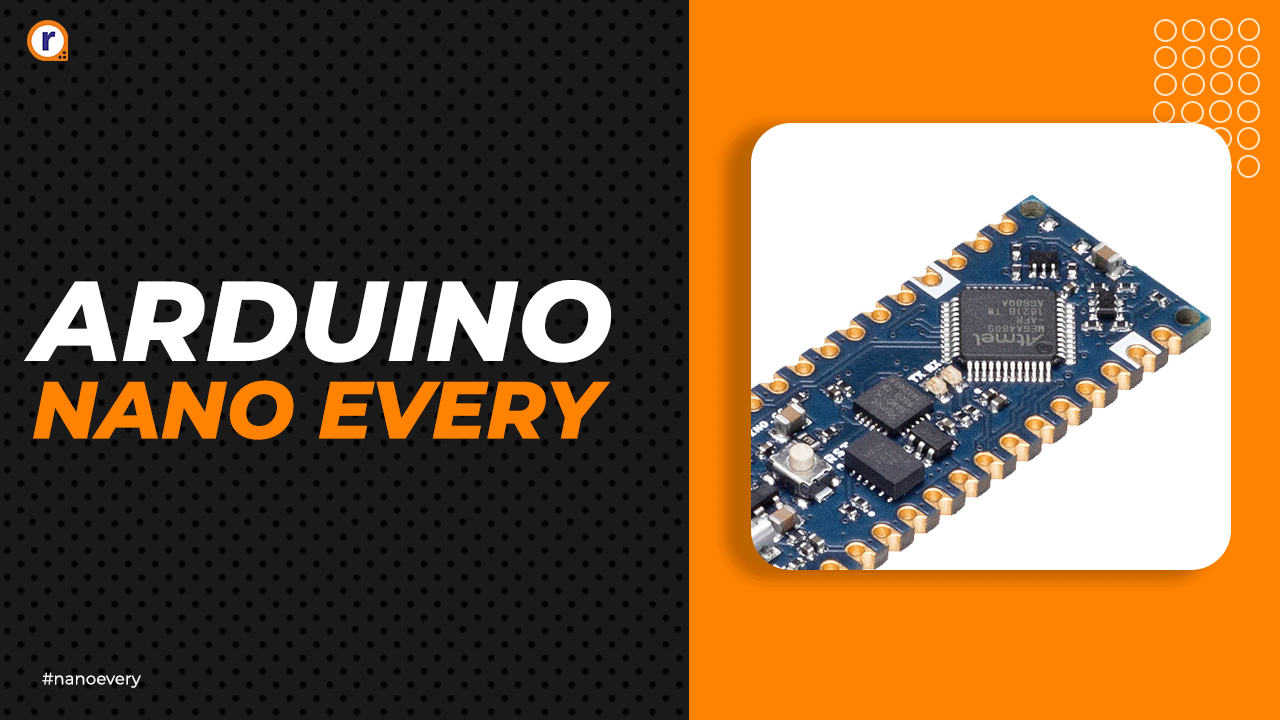
It's quite similar to Arduino UNO when it comes to features and pinouts but it has replaced UNO because of its small size. As you all know size matters a lot in Embedded as well. Embedded devices are preferred to be smaller in size.

- Operating Voltage (logic level): 5V
- 8 analog inputs ports: A0 ~ A7
- 14 Digital input / output ports: TX, RX, D2 ~ D13
- 1 pair of TTL level serial transceiver ports RX / TX
- There is a bootloader installed in it
- Manual reset switch.
Application:
- Embedded Systems.
- Automation.
- Robotics.
- Control Systems.
- Instrumentation.
Arduino Leonardo
Leonardo is different from other Arduino boards because it has a microcontroller with inbuilt USB 2.0 communication.

- Microcontroller: ATmega32u4
- Operating Voltage: 5V
- Input Voltage (limits): 6-20V
- Digital I/O Pins: 20
- PWM Channels: 7
- Analog Input Channels: 12
Application:
- Industrial Automation
- Health and Security Systems
- Creating a wireless keyboard
- Automatic Pill Dispenser
- Embedded Systems
- Water Level Meter
Arduino Due
The Arduino Due is the first Arduino board based on a 32-bit ARM core microcontroller. It is the perfect board for a powerful larger scale Arduino project.

- Microcontroller: AT91SAM3X8E
- Input Voltage (Limit): 6-16V
- Input Voltage (Recommended): 7-12V
- Analog I/O Pins: 12
- Digital Pins: 54(12 provide PWM output)
- Clock speed: 84MHz
- Flash Memory:512KB
Application:
- Industrial Automation
- Home and Security Systems
- Virtual Reality Applications
- Android Applications
- GSM Based Projects
- Embedded System
LilyPad Arduino
The LilyPad Arduino is a microcontroller board designed for wearables and e-textiles. It can be sewn to fabric and similarly mounted power supplies, sensors, and actuators with conductive thread.

- Microcontroller: ATmega168 or ATmega328V
- Operating Voltage: 2.7-5.5 V
- Digital I/O Pins: 14
- PWM Channels: 6
- Analog Input Channels: 6
- Board will run from 2V to 5V.
Application:
- Remote control a robotic hand
- Starry night prom
- TV T-shirt
- Fiber optic homecoming
Arduino Micro
Arduino Micro, as the name suggests, it is the smallest board in the Arduino Community. It is comparable to its counterparts like Arduino Nano and Arduino Pro mini. It contains a built-in USB on the tiny easy to integrate interface, that helps in laying out a prompt connection with the computer.

- Microcontroller: ATmega32u4
- Input voltage (recommended) : 7V to 12V
- Input Voltage (limit): 6V to 20V
- Digital I/O pins:20 (of which 7 can be used as PWM outputs)
- Analog Input pins:12
- Flash memory: 32KB
Application:
- USB Joystick
- Electric Bike
- Windows PC lock/unlock application
- Creating a wireless keyboard
- Automatic Pill Dispenser
- USB Trackpad
- Water Level Meter
Arduino Pro Mini
The Arduino Pro Mini is intended for advanced users who require flexibility, low-cost, and small size. It comes with the minimum of components (no on-board USB or pin headers) to keep the cost down.

- Microcontroller: ATmega328
- Circuit Operating Voltage: 3.3V
- Clock frequency: 8MHz.
- Digital I/O Pins: 14
- 8 analog input port: A0 ~ A7.
- A pair of TTL level serial port transceiver: RX / TX
- 6 PWM port: D3, D5, D6, D9, D10, D11.
Applications of Arduino Microcontroller:
- Hobby projects.
- Power supply systems.
- IoT applications.
- Display systems.
- Instrumentation.
I hope you enjoyed reading this article, we have more coming about Arduino and Raspberry Pi, So don't forget to subscribe to our newsletter to learn from us.
Meanwhile, Go here to explore more Arduino boards and their accessories.


