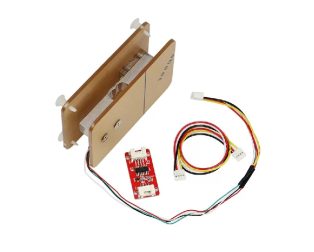
This is a YZC-133 Weighing Load Cell Sensor 10kg For Electronic Weighing Scale.
This straight bar load cell (sometimes called a strain gauge) can translate up to 10 kg of pressure (force) into an electrical signal. Each load cell is able to measure the electrical resistance that changes in response to, and proportional of, the strain (e.g. pressure or force) applied to the bar.
With this gauge, you will be able to tell just how heavy an object is, if an object’s weight changes over time, or if you simply need to sense the presence of an object by measuring strain or load applied to a surface. This straight bar load cell is made from an aluminum alloy and is capable of reading a capacity of 1KG of weight
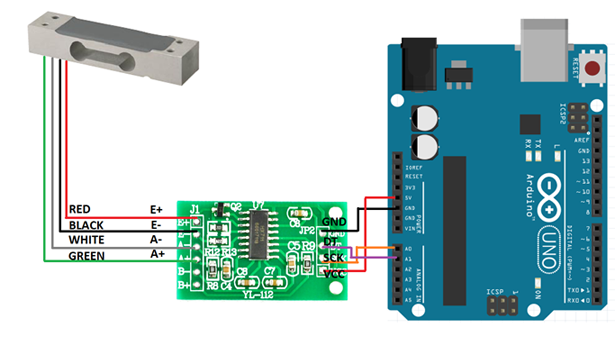
It has Four lead wires which can be connected to HX711 A/D Pressure Sensor. It is easy to use with driving voltage 5-10V and produces the output voltage as per the force changes over it.
Installation of the Sensor is also a simple task, it needs to fix one end through the screw hole and the other end left floating state, according to the label indicates the direction of the gravitational force exerted particular attention must not directly push the white plastic cover part of the sensor in order to avoid damage.
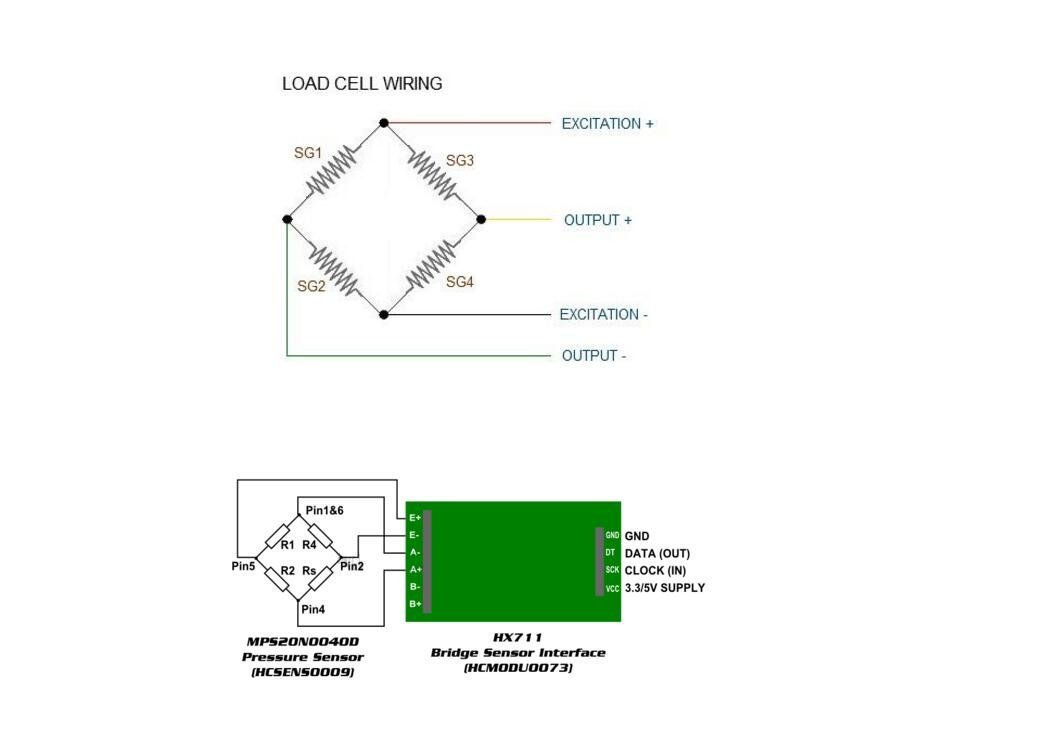
An electronic weighing machine uses a load cell to measure the load or pressure produced by the load, here most load cells follow the method of the strain gauge, Which converts the pressure (force) into an electrical signal, these load cells have four strain gauges that are hooked up in a Wheatstone bridge formation.
When we apply to load the strain gauge resistance will change and hence the output voltage from the load cell get changes by the way we can measure the load value.
To Explore more Pressure Sensors, Click here
Wheatstone bridge formation of Load Cell:
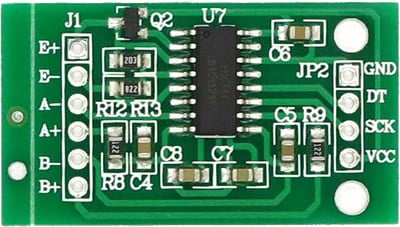
HX711 (24 bit Analog to Digital Converter)
HX 711 is a precision 24-bit analog to digital converter (ADC) specially designed for weighing scales and industrial control applications to interface directly with a bridge sensor.
Simply connect Load cell wires to the HX711 module based on their color, then connect DAT (Data) pin to Arduino Analog pin A1 and connect CLK (Clock) pin to Arduin0 Analog pin A0, Put Vcc and GND supply from Arduino power source pins.






There are no reviews yet.