Change Fan Speed with Temperature – Easy and Affordable
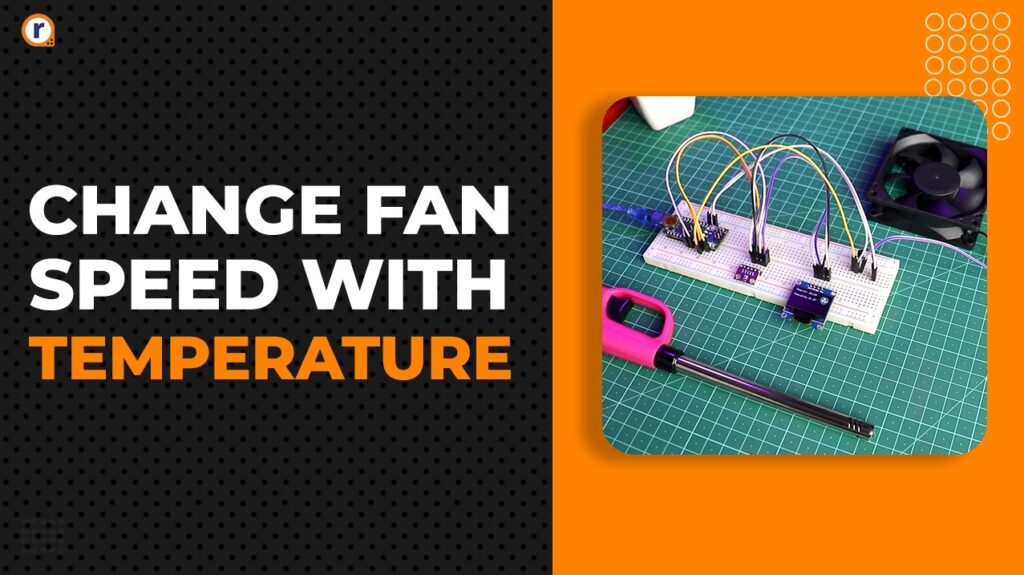
Hello, everyone. In this blog I’ll show you how you can control fan speed with accordance with temperature using BME 280. And we’ll use the BME 280 sensor with Arduino

Hello, everyone. In this blog I'll show you how you can control fan speed with accordance with temperature using BME 280. And we'll use the BME 280 sensor with Arduino and also a oled display to display temperature and some other stats too.
So, lets get started
How we gonna change Fan Speed ?
So basically we'll be using a temperature sensor along with Arduino Nano, or any of the Arduino Board. And the Arduino will be controlling the base of a transistor to control the flow of the current to the 5v fan, through which we'll be able to control the speed of the fan.
We can replace the transistor with MOSFET to improve efficiency when controlling fan with higher current rating. As BJT's tends to get hot at those higher amps. But for this purpose we'll stick to BJT's i.e. BC547.
What is Arduino ?
Arduino is an open-source electronics platform based on easy-to-use hardware and software.
Arduino boards are able to read inputs - light on a sensor, a finger on a button, and turn it into an output activating a motor, turning on an LED, publishing something online and many more.
And here we'll be using Arduino Nano specifically, you can use any other board of the Arduino family.
Some of the Arduino Nano's features -
- Microcontroller: ATmega328
- SRAM: 2 KB
- Digital I/O Pins: 22
- PWM Pins: 6
- Analog Input Pins: 8
- Clock Speed: 16 MHz
What is BME 280 ?
It is mainly used for temperature compensation of the pressure and humidity sensors, and can also be used for estimating ambient temperature. The BME 280 supports a full range of operating modes which provide the flexibility to optimize the device for power consumption, resolution and filter performance of its intended operation.
And it also has wide operating range of temperature from -40 to +85 C. Which makes it ideal of wide range of applications.
Transistor and Fan
In here, we've choose a 5V fan which is 80*80 mm in size and BC547 for the transistor to control the current flowing into the fan, indirectly controlling the speed of the fan.
Hardware Requirements of this Project
- Arduino Nano
- BME 280
- SSD1306 Oled Display
- 5V Fan
- BC547
- Jumper Wires
- Breadboard
- Lighter (For testing only)
Software Requirements of this Project
- Arduino IDE
- Adafruit Libraries for SSD1306 display and BME 280 sensor
Circuit Diagram and Hardware Interfacing
Circuit Diagram

Hardware Interfacing
Arduino Nano
|
Arduino Nano |
BME 280 |
|
A4 |
SDA |
|
A5 |
SCL |
|
5V |
VCC |
|
GND |
GND |
|
Arduino Nano |
SSD 1306 |
|
A4 |
SDA |
|
A5 |
SCL |
|
5V |
VCC |
|
GND |
GND |
Coding
Copy the following code into your Arduino IDE and upload it to your Arduino Board. And before uploading make sure to select the appropriate Arduino Board and the port on which it is present up at the top.
And make sure that the "fan_bitmap.h" file is save with that name as exact. Otherwise you'll need to change it in the main code also.
main code
#include <Wire.h>
#include <Adafruit_Sensor.h>
#include <Adafruit_BME280.h>
#include <Adafruit_GFX.h>
#include <Adafruit_SSD1306.h>
#include "fan_bitmap.h"

Adafruit_BME280 bme;
#define BME280_ADDRESS 0x76

#define OLED_RESET     -1
#define SCREEN_ADDRESS 0x3C
Adafruit_SSD1306 display(128, 64, &Wire, OLED_RESET);

void setup() {
  Serial.begin(9600);
  pinMode(3, OUTPUT);

  if (!bme.begin(BME280_ADDRESS)) {
    Serial.println("Could not find a valid BME280 sensor, check wiring!");
    while (1);
  }

  if(!display.begin(SSD1306_SWITCHCAPVCC, SCREEN_ADDRESS)) {
    Serial.println("SSD1306 allocation failed");
    while (1);
  }

  Serial.println("BME280 sensor initialized successfully.");
  Serial.println("SSD1306 display initialized successfully.");

  display.display();
  delay(2000);
  display.clearDisplay();
}

void loop() {
  int x = 50;

  for(int i = 0; i < 4; i++) {

    float temperature = bme.readTemperature();
    float humidity = bme.readHumidity();
    float pressure = bme.readPressure() / 100.0F;

    display.clearDisplay();

    display.setTextSize(1);
    display.setTextColor(WHITE);

    display.setCursor(0, 0);
    display.print("Temp(C):");
    display.setCursor(50, 0);
    display.print(temperature);

    display.setCursor(0, 20);
    display.print("Humidity:");
    display.setCursor(55, 20);
    display.print(humidity);

    display.setCursor(0, 40);
    display.print("Pressure:");
    display.setCursor(55, 40);
    display.print(pressure);

    if(temperature >= 30){
      display.drawBitmap(98, 0, fanBitmaps[i], 30, 31, WHITE);
      analogWrite(3, map(temperature, 30, 50, 100, 255));
      if(temperature >= 50)
        analogWrite(3, 255);
    }
    else{
      display.drawBitmap(98, 0, fanBitmaps[0], 30, 31, WHITE);
      analogWrite(3, 0);
    }

    display.display();
    delay(x);

  }
}
fan_bitmap.h
#ifndef FAN_BITMAP_H
#define FAN_BITMAP_H

const unsigned char fan_0[] PROGMEM = {
	0x00, 0x00, 0x00, 0x00, 0x00, 0x00, 0x00, 0x00, 0x00, 0x3f, 0xf0, 0x00, 0x00, 0xc0, 0x0c, 0x00,
	0x03, 0x00, 0x03, 0x00, 0x06, 0x1f, 0xc1, 0x80, 0x0c, 0x3f, 0xe0, 0xc0, 0x18, 0x7f, 0xf0, 0x40,
	0x10, 0x7f, 0xf8, 0x60, 0x20, 0x7f, 0xf8, 0x20, 0x20, 0x7f, 0xe0, 0x30, 0x20, 0x3f, 0xc0, 0x10,
	0x60, 0x1f, 0x80, 0x10, 0x43, 0x87, 0xbf, 0x18, 0x47, 0xed, 0xbf, 0x98, 0x47, 0xfc, 0xbf, 0x98,
	0x47, 0xf7, 0xbf, 0x98, 0x47, 0xf8, 0x7f, 0x98, 0x27, 0xfe, 0xff, 0x90, 0x23, 0xfe, 0xff, 0x10,
	0x23, 0xfc, 0xff, 0x20, 0x11, 0xfc, 0xfe, 0x20, 0x10, 0xf8, 0xf8, 0x40, 0x08, 0x70, 0x60, 0xc0,
	0x04, 0x00, 0x01, 0x80, 0x02, 0x00, 0x03, 0x00, 0x01, 0x80, 0x06, 0x00, 0x00, 0x70, 0x38, 0x00,
	0x00, 0x0f, 0xc0, 0x00, 0x00, 0x00, 0x00, 0x00, 0x00, 0x00, 0x00, 0x00
};

const unsigned char fan_1[] PROGMEM = {
	0x00, 0x00, 0x00, 0x00, 0x00, 0x0f, 0xe0, 0x00, 0x00, 0x38, 0x1c, 0x00, 0x00, 0xc0, 0x03, 0x00,
	0x01, 0x80, 0x01, 0x80, 0x02, 0x0f, 0x80, 0xc0, 0x04, 0x3f, 0xc0, 0x60, 0x0c, 0x7f, 0xc0, 0x30,
	0x08, 0xff, 0xc0, 0x10, 0x11, 0xff, 0x8f, 0x18, 0x11, 0xff, 0x9f, 0x88, 0x31, 0xff, 0x3f, 0xc8,
	0x20, 0xfd, 0xbf, 0xc8, 0x20, 0x7b, 0xdf, 0xcc, 0x20, 0x1e, 0x5f, 0xcc, 0x20, 0x02, 0xdf, 0xcc,
	0x20, 0xfb, 0xff, 0xc8, 0x21, 0xfc, 0x1f, 0xc8, 0x11, 0xff, 0xcf, 0x88, 0x10, 0xff, 0xc7, 0x88,
	0x10, 0xff, 0xc6, 0x10, 0x08, 0xff, 0xc0, 0x10, 0x0c, 0x7f, 0xc0, 0x20, 0x06, 0x3f, 0xc0, 0x60,
	0x03, 0x0f, 0x80, 0xc0, 0x01, 0x80, 0x01, 0x80, 0x00, 0xe0, 0x06, 0x00, 0x00, 0x3f, 0xf8, 0x00,
	0x00, 0x07, 0xc0, 0x00, 0x00, 0x00, 0x00, 0x00
};

const unsigned char fan_2[] PROGMEM = {
	0x00, 0x00, 0x00, 0x00, 0x00, 0x00, 0x00, 0x00, 0x00, 0x0f, 0xc0, 0x00, 0x00, 0x70, 0x38, 0x00,
	0x01, 0x80, 0x06, 0x00, 0x03, 0x00, 0x01, 0x00, 0x06, 0x00, 0x00, 0x80, 0x0c, 0x18, 0x38, 0x40,
	0x08, 0x7c, 0x7c, 0x20, 0x11, 0xfc, 0xfe, 0x20, 0x13, 0xfc, 0xff, 0x10, 0x23, 0xfd, 0xff, 0x10,
	0x27, 0xfd, 0xff, 0x90, 0x67, 0xf8, 0x7f, 0x88, 0x67, 0xf7, 0xbf, 0x88, 0x67, 0xf4, 0xff, 0x88,
	0x67, 0xf6, 0xdf, 0x88, 0x63, 0xf7, 0x87, 0x08, 0x20, 0x07, 0xe0, 0x18, 0x20, 0x0f, 0xf0, 0x10,
	0x30, 0x1f, 0xf8, 0x10, 0x10, 0x7f, 0xf8, 0x10, 0x18, 0x7f, 0xf8, 0x20, 0x08, 0x3f, 0xf8, 0x60,
	0x0c, 0x1f, 0xf0, 0xc0, 0x06, 0x0f, 0xe1, 0x80, 0x03, 0x00, 0x03, 0x00, 0x00, 0xc0, 0x0c, 0x00,
	0x00, 0x3f, 0xf0, 0x00, 0x00, 0x00, 0x00, 0x00, 0x00, 0x00, 0x00, 0x00
};


const unsigned char fan_3[] PROGMEM = {
	0x00, 0x00, 0x00, 0x00, 0x00, 0x07, 0xc0, 0x00, 0x00, 0x3f, 0xf8, 0x00, 0x00, 0xc0, 0x0e, 0x00,
	0x03, 0x00, 0x03, 0x00, 0x06, 0x03, 0xe1, 0x80, 0x0c, 0x07, 0xf8, 0xc0, 0x08, 0x07, 0xfc, 0x60,
	0x10, 0x07, 0xfe, 0x20, 0x10, 0xc7, 0xfe, 0x10, 0x23, 0xc7, 0xfe, 0x10, 0x23, 0xe7, 0xff, 0x10,
	0x27, 0xf0, 0x7f, 0x08, 0x27, 0xff, 0xbe, 0x08, 0x67, 0xf6, 0x80, 0x08, 0x67, 0xf4, 0xf0, 0x08,
	0x67, 0xf7, 0xbc, 0x08, 0x27, 0xfb, 0x7e, 0x08, 0x27, 0xf9, 0xff, 0x18, 0x23, 0xf3, 0xff, 0x10,
	0x31, 0xe3, 0xff, 0x10, 0x10, 0x07, 0xfe, 0x20, 0x18, 0x07, 0xfc, 0x60, 0x0c, 0x07, 0xf8, 0x40,
	0x06, 0x03, 0xe0, 0x80, 0x03, 0x00, 0x03, 0x00, 0x01, 0x80, 0x06, 0x00, 0x00, 0x70, 0x38, 0x00,
	0x00, 0x0f, 0xe0, 0x00, 0x00, 0x00, 0x00, 0x00
};

const unsigned char* fanBitmaps[] = { fan_0, fan_1, fan_2, fan_3 };

#endif // FAN_BITMAP_H
Working Principle
There's not much to say in here, we're reading temperature, humidity and pressure off the sensor and displaying on the OLED display. And side by side we're checking for the temperature also, and if the temperature exceeds lets say 30C.
Then we're switching the transistor on lowest possible value and as the temperature rises we'll increase the fan's speed accordingly. And if the temperature is above 50C then we're switching the transistor fully on.
And as for the bitmap we're displaying on the OLED display, we've used "image to cpp" website to generate 4 bitmaps of a fan's image rotating at 0, 90, 180, 270 degree respectively. And we're selecting the images in order to give a visual representation of the fan is spinning when the temp is over 30C.
Conclusion
If upto this point, you haven't faced any errors and the fan is spinning in accordance with the temperature. Then congratulations you've successfully learned how to control fan with rise and fall in temperature.
And also learned how to interface multiple devices over I2C. If you're facing any issues or difficulties. Feel free to ask down below.
If you want to see the video of this project, follow this link - Change Fan Speed with Temperature
- For more such Arduino and Raspberry Pi based projects,
check out our Arduino Playlist and Raspberry Pi Playlist
- And for other more interesting projects, check our main YouTube Channel


